Tiny quail chicks need a warm, enclosed space from the moment they hatch, and a poorly planned brooder can quickly lead to chilling, drowning, piling, or escaped chicks.
We have found that the right setup starts with choosing a brooder that matches the number of chicks, available space, and type of heat you plan to use.
Some commercial quail brooders are ready to use with little setup, while a simple quail brooder box or DIY tote can work well for a small batch.
In the options below, we’ll look at practical brooders for Coturnix and Bobwhite quail, along with the heat, bedding, feeders, and waterers needed to keep chicks warm, dry, and safe during those critical first weeks.
What Is a Quail Brooder? And Why It Matters for Chick Survival
A quail brooder is a warm, protected space that takes the place of a mother quail after the chicks hatch.
It gives them steady heat, safe bedding, and easy access to feed and water until they can handle normal temperatures on their own.
The Mother Quail Substitute
A brooder needs to do three basic jobs:
Newly hatched quail chicks need steady heat because they cannot regulate their body temperature well on their own. An external heat source keeps them comfortable during those first few weeks.
The brooder also gives chicks a safe place to grow. It protects them from drafts, predators, unsafe bedding, and other hazards around the farm.
Food and water need to be easy for tiny chicks to reach. Low feeders and chick-safe waterers help reduce spills and lower the risk of injuries or drowning.
For most backyard setups, a commercial quail brooder or a properly built quail brooder box can handle these needs without making the setup complicated.
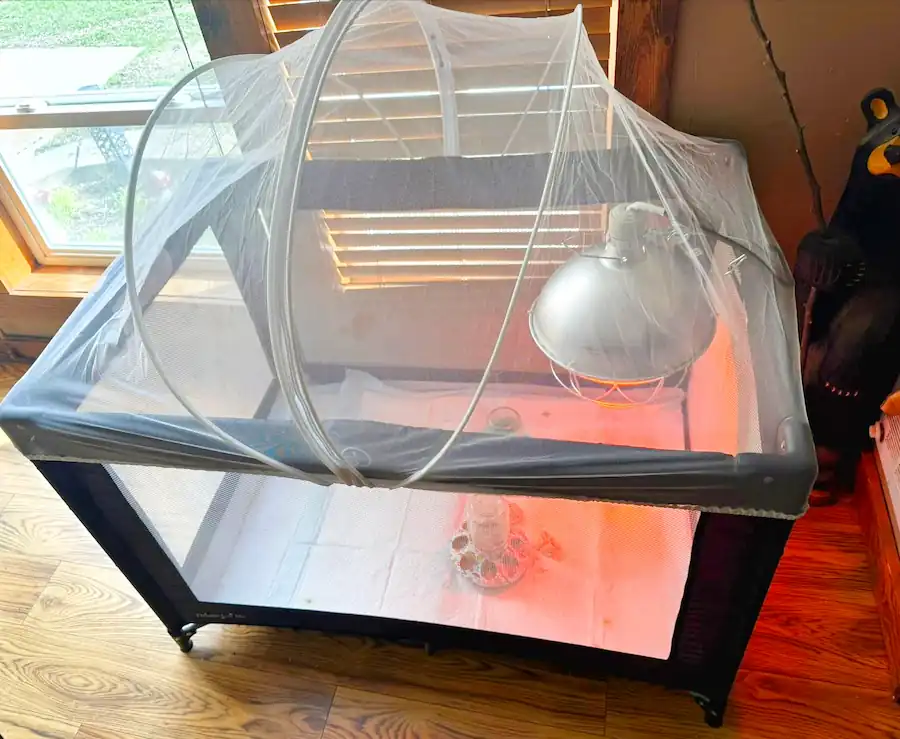
At Carter Farm, we use the Tetuga pop-up brooder for our Coturnix quail when we need a setup that is quick to put together and easy to store afterward.
Its 45.3 × 22 × 20.3-inch size gives our chicks plenty of room to move around, while the mesh sides keep the air moving and let us check on them easily.
We found it quite easy to clean. You can remove the washable floor pad to deal with droppings and spilled water without taking the whole brooder apart.
For hatching season, the foldable design is especially handy because we can collapse it and store it when the quail chicks have moved to their next setup.
The included ground pegs also help keep it secure if we use it outdoors. Keep in mind that a heat source is not included, so we add our own suitable brooder heat.
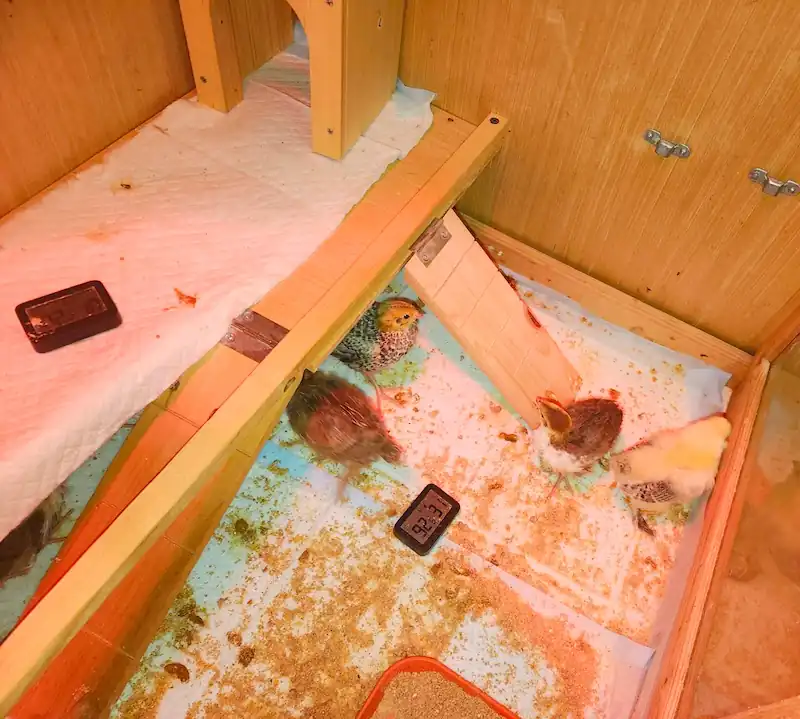
This one takes a different approach with a compact wooden box and clear acrylic panels.
For a small group of quail chicks, the enclosed design makes it easy to keep an eye on them while the adjustable heating lamp provides the main heat source.
We’d look at this option when space is limited and you want most of the basic equipment in one package.
It includes a feeder, waterer, thermometer, heating lamp, bulb base, and bedding. The 15.7 × 12 × 12-inch size also means you should plan on moving growing chicks to a larger space rather than treating this as a long-term brooder.
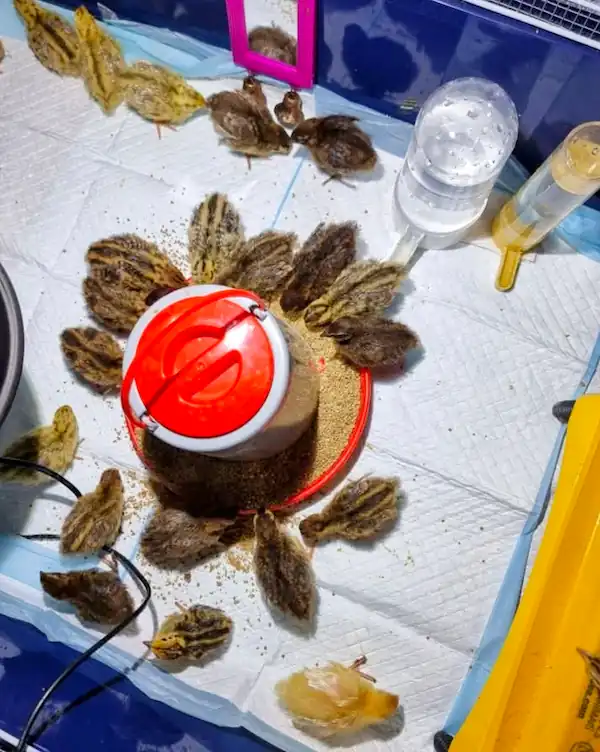
When we have a larger hatch of quail chicks, the 42 × 42 × 36.6-inch floor area gives them much more room to move between the warm and cooler parts of the brooder.
You can use this extra space for both Coturnix and Northern Bobwhite quail as they become more active.
The package includes a thermometer, feeder, waterer, adjustable bulb heating system, perch, and four pee pads, so several of the basic brooding supplies are included.
Breathable mesh panels allow airflow, while the removable top cover gives us more control over the enclosure. The bottom mat and pee pads also make it easier to handle the mess that comes with a growing group of quail chicks.
When storage space matters, the collapsible design is another practical feature. It can be folded down after the chicks move to their next setup.
If you want a ready-to-use brooding kit, Phoncoo packs quite a bit into a foldable 45 × 23 × 20.5-inch pen.
Along with the enclosure, you get an adjustable heating plate, feeder, waterer, base mat, nesting pad, insulated pad, perch, and storage bag.
The heating plate is adjustable from 50–158°F according to the product listing, with adjustable height and tilt.
Its dual-door design gives us easy access for feeding and cleaning without having to dismantle the pen. The removable top and bottom mat also make routine cleanup easier.
For a more permanent indoor setup, the Kinchoix metal brooder brings a sturdier design.
Its 32 × 16 × 16-inch steel body is easy to wipe down, while the deep pull-out tray gives you a much easier way to remove soiled bedding.
A built-in adjustable heat-lamp stand lets you change the lamp height as the chicks grow. The hydraulic lid is another useful touch because you can lift it for feeding or cleaning without wrestling with a heavy metal panel.
Vent openings and a sliding panel allow you to adjust airflow without opening the entire brooder.
Keep in mind that the heat lamp is not included, so you’ll need to supply a compatible lamp separately.
How to Choose a Quail Brooder
Flock size: Small batches can work well in a storage tote. Larger hatches need more floor space, especially as chicks grow quickly. A 55-gallon tote setup shared by a quail keeper measured 48 × 21 inches and provided separate warm and cool areas.
Budget: A DIY tote or wooden brooder can keep the initial cost down. Ready-made brooders cost more but may include useful extras such as heating, feeders, waterers, mats, and temperature controls.
Space and portability: A plastic tote or pop-up brooder is easier to move and store between hatches. A wooden brooder takes up a more permanent spot but can be built to suit your available space.
Heat source: Heat plates give chicks a heated area they can move under and away from. Heat lamps provide overhead heat but need secure mounting and careful clearance from bedding and other materials. Quail keepers report using both approaches, with safety and correct temperature being recurring concerns.
Safety and ventilation: Give chicks a warm zone and a cooler area so they can move away from the heat. A secure lid or hardware-cloth top also becomes important once quail chicks start hopping and flying.
DIY Quail Brooder: Three Practical Setups We Use
A DIY quail brooder can be as simple as a storage tote or as permanent as a wooden box. The main goals are the same: give chicks steady heat, enough floor space, fresh air without drafts, and safe access to feed and water.
We use the setup that fits the batch instead of building something complicated from the start.
1. Storage Tote Quail Brooder
A heavy-duty plastic tote is an inexpensive quail brooder box for a small batch. An 18-gallon Rubbermaid Roughneck tote is one option.
Cut most of the center from the lid and cover the opening with 1/4-inch hardware cloth. Secure the mesh tightly and remove any sharp edges.
You’ll need:
18-gallon plastic tote
1/4-inch hardware cloth
Zip ties or suitable fasteners
Heat source
Thermometer
Dry bedding
Small feeder and chick-safe waterer
Keep the heat source over one end rather than heating the entire tote. This gives chicks a warm area and a cooler area where they can move away from the heat.
A heat lamp needs extra care around plastic. Never let the lamp or hot bulb touch the tote, and don’t rely on a clamp alone to hold it safely. A heat plate is another option for a tote brooder.
Mississippi State Extension recommends about 90–95°F during the first week, then reducing the temperature by about 5°F each week.
Keep the thermometer at chick level rather than several inches above the floor.
2. Gorilla Cart Brooder
A large poly garden cart can be turned into a useful brooder when a tote doesn’t provide enough floor space.
The Gorilla Carts GOR4PS has a 36 × 20-inch poly bed with a 4-cubic-foot capacity, giving you considerably more room than a small storage tote.
Add a rigid hardware-cloth lid and use a heat plate or securely mounted heat source above one section.
Its smooth poly surface is easy to clean, and the cart can be emptied quickly when bedding needs changing. The downside is its larger size, weight, and higher cost.
We also like putting the quail feeder and waterer on a low, stable platform. It keeps some bedding out of the feed and water and makes daily cleaning easier.
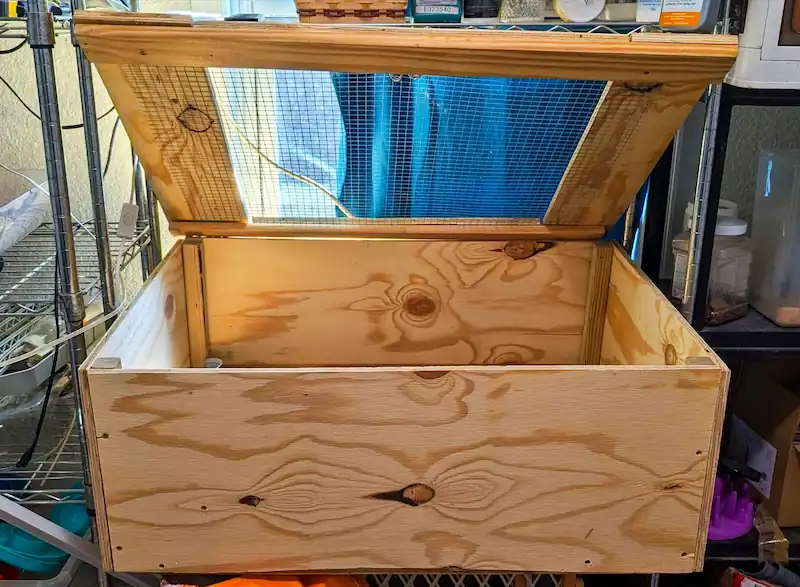
3. Wooden Quail Brooder
A wooden brooder makes sense if you hatch quail regularly.
You can build it to your available space and add a hinged hardware-cloth lid, access door, and heat area exactly where you want them.
For a simple 2 × 3-foot brooder, you’ll need:
Plywood or suitable lumber
1/4-inch hardware cloth
Screws and washers
Hinges and a latch
Heat source
Thermometer
Keep the lower sections solid to block drafts and use hardware cloth where ventilation is needed.
Don’t completely seal the brooder. Quail chicks need fresh air without a direct cold draft.
Make the inside smooth and easy to clean. If you use unfinished wood, moisture and odors can soak into it, so sealing the interior with a suitable, fully cured finish can make maintenance easier.
Which DIY Brooder Should You Use?
For a small hatch, a storage tote is the easiest and cheapest starting point.
For larger batches, a poly cart gives you more usable floor space.
For regular hatching, a wooden brooder is worth building because you can customize it and reuse it for years.
The box itself doesn’t need to be fancy. Safe heat, adequate space, good ventilation, clean bedding, and secure food and water are what matter most.
A brooder box is only part of the setup. Quail chicks also need safe heat, clean water, feed, dry bedding, and a secure top.
Heat Source
A radiant heat plate gives chicks a warm area to move under and away from. Brinsea Ecoglow Safety 600 and Vrooder Heater Plate are two options to look at.
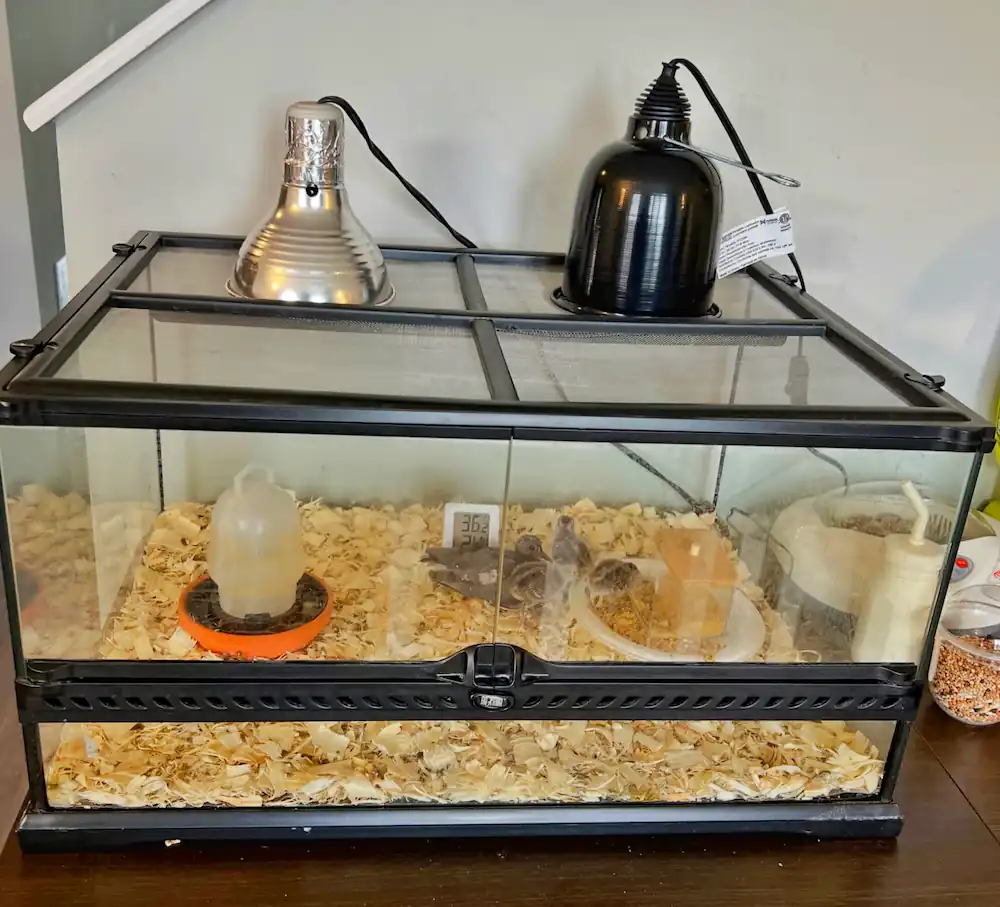
A heat lamp is another option. The Fluker’s Repta-Clamp Lamp with Dimmer can help adjust the heat output when paired with a suitable bulb.
Mount any heat lamp securely and keep it well away from bedding and the brooder walls.
Thermometer
Use a digital thermometer with the probe positioned at chick level. That gives you a more useful reading than checking the temperature higher up in the brooder.
An infrared thermometer can also help with quick spot checks.
Waterer
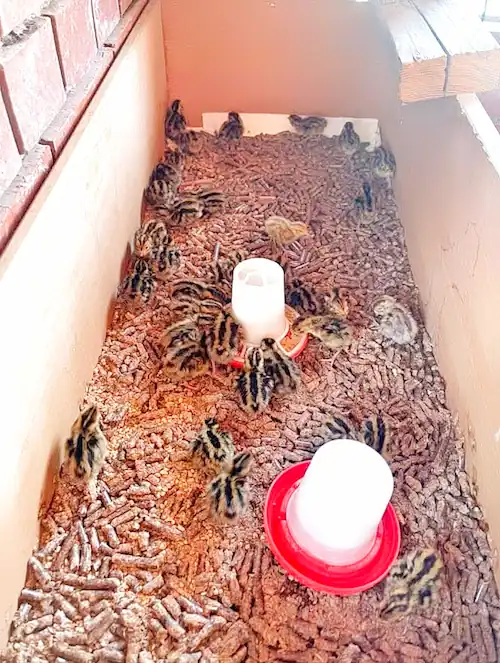
Choose a shallow, chick-safe waterer that quail chicks can reach without climbing into it. The Brower 11-3/4 Inch Top Hanging Poultry Waterer Base can be paired with a small-mouth mason jar.
Another option is the RentACoop 1.5L feeder and waterer kit.
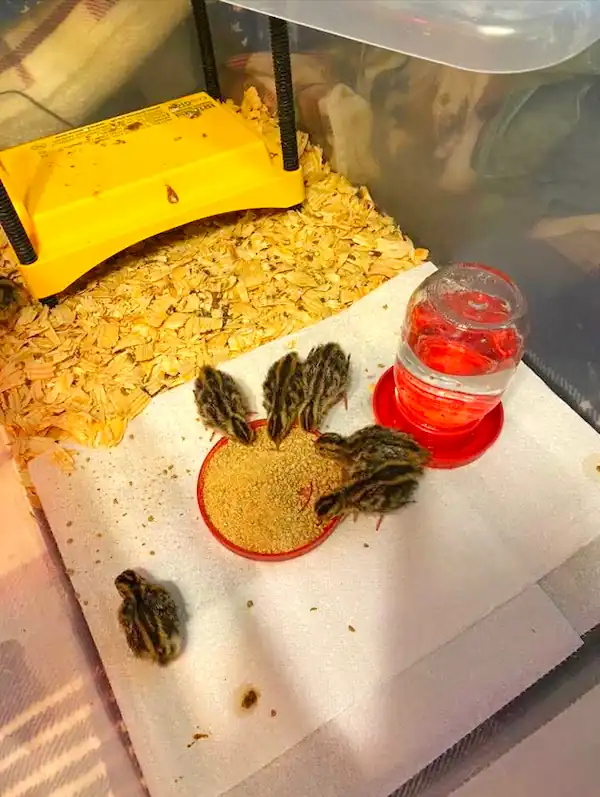
For the first few days, clean marbles or pebbles in the water tray can help reduce the chance of a tiny chick falling into deeper water.
Feeder
A shallow chick feeder works well for young quail. Small openings help keep chicks from scratching large amounts of feed onto the bedding.
The RentACoop 1.5L feeder or a simple mason jar feeder base can handle a small brooder setup.
Bedding
Pine shavings, paper towels, and puppy pads are practical choices. Avoid cedar shavings.
For the first few days, paper towels over the bedding give chicks better footing and make it easier to monitor droppings and spilled feed. Change them when they become wet or heavily soiled.
Secure Lid
Quail chicks become surprisingly active as they grow. Cover the brooder with 1/4-inch hardware cloth or another secure, small-mesh top.
Fasten the lid firmly with zip ties, clips, or another method that chicks cannot push open.
A Few Useful Extras
Keep a few basic supplies nearby, including zip ties, clamps, and a small block or platform for raising the feeder and waterer as needed.
A dimmable or low-wattage light on a timer can help maintain a consistent day and night cycle, but bright lighting around the clock is unnecessary.
Once chicks are old enough, you can add a shallow dust-bathing area with fine sand. It does not need to be part of the brooder from day one.
Step-by-Step Quail Brooder Setup
1. Choose the Location
Set the brooder indoors in a draft-free, predator-safe area. Keep it away from direct sunlight and busy household areas.
Use a sturdy, level surface. If you use a heat lamp, keep it away from carpet and other materials that could overheat.
2. Prepare the Brooder
Add a clean layer of pine shavings or another suitable bedding. For the first few days, paper towels over the bedding provide good footing and make it easier to monitor droppings.
Check the brooder for gaps, sharp edges, or loose hardware before adding chicks.
3. Add the Heat Source
Set a radiant heat plate low enough for day-old chicks to reach the warm surface comfortably.
For a heat lamp, secure it to a stable support rather than the brooder itself. Position it at one end so the chicks can move between warmer and cooler areas.
Keep cords out of reach and check all connections before the chicks arrive.
4. Add Food and Water
Fill the waterer with fresh water and use a chick-safe design. Clean marbles or pebbles can be added to the water tray during the first week to reduce the risk of drowning.
Place the feeder and waterer away from the direct heat. A small platform can help keep bedding out of both.
5. Secure the Top
Cover the brooder with 1/4-inch hardware cloth or another secure, small-mesh lid. Fasten it firmly so active quail chicks cannot push their way out.
6. Test Everything First
Turn on the heat several hours before the chicks arrive. Check the temperature at chick level and make sure the brooder has both a warm and cooler area.
Have fresh water, quail starter feed, clean bedding, and any needed heat adjustments ready before the chicks go in.
Brooder Temperature Guide: Week-by-Week Schedule
Start around 95°F at chick level and reduce the temperature by about 5°F each week. Give chicks enough space to move toward or away from the heat.
Age
Target temperature
Days 1–3
95–100°F (35–37.8°C)
Days 4–7
90–95°F (32.2–35°C)
Week 2
85–90°F (29.4–32.2°C)
Week 3
80–85°F (26.7–29.4°C)
Week 4
75–80°F (23.9–26.7°C)
Week 5
70–75°F (21.1–23.9°C)
Watch the Chicks
Chick behavior often tells you more than the thermometer.
Huddling tightly under the heat usually means they are cold.
Staying far from the heat, panting, or spreading their wings can mean they are too hot.
Active chicks spread around the brooder and settle quietly when comfortable.
Check Temperature at Chick Level
Place the thermometer where the chicks stand, not high above them. Keep a warm area and a cooler area so they can move as needed.
With a heat lamp, adjust the height or dimmer. With a radiant plate, raise the plate as the chicks grow.
Once chicks are fully feathered and room temperatures are mild, you can gradually reduce their dependence on supplemental heat.
Feeding & Watering Quail Chicks in the Brooder
Starter Feed
Use a quality game bird starter crumble with around 28–30% protein for young quail chicks. Keep feed available throughout the day during the early weeks.
A shallow feeder or jar-style feeder works well and helps reduce scratching and waste.
If you plan to give treats, offer a small amount of chick-sized grit separately once chicks are eating other foods.
Fresh Water
Give chicks fresh, clean water every day. A shallow, chick-safe waterer is important because quail chicks can drown in surprisingly little water.
For the first week, clean marbles or pebbles in the water tray can provide extra protection. Once chicks are larger, they can be removed.
When chicks first arrive, gently touch each chick’s beak to the water so it knows where to drink.
Treats and Supplements
Starter feed should provide the main nutrition.
After the first few days, tiny amounts of finely chopped greens or hard-boiled egg can be offered occasionally.
Electrolytes or probiotics may be useful for shipped chicks or chicks showing signs of stress, but they are not a substitute for clean water and proper feed.
For more information on what quail eat, including foods beyond the brooder stage, see our feeding guide.
Common Feeding Problems
Pasty butt: Check chicks daily. Clean a blocked vent gently with warm water and a soft cloth.
Feed waste: Use a feeder with a lip or small openings to reduce scratching.
Dirty water: Rinse and refill the waterer daily, or sooner if bedding or droppings get into it.
Brooder Hygiene & Health Management
Clean, dry bedding is one of the easiest ways to keep a quail brooder healthier.
Daily Cleaning
Remove wet or heavily soiled bedding, especially around the feeder and waterer.
Replace contaminated bedding with dry material.
Rinse the waterer and refill it with fresh water.
Wipe the feeder when feed or droppings build up.
Regular Deep Cleaning
Give the brooder a full clean when it becomes dirty or between batches. Remove the chicks first, discard the bedding, and wash the brooder with a poultry-safe cleaner.
Let everything dry completely before adding fresh bedding.
Common Brooder Problems
Splayed legs can occur when young chicks cannot get a good grip on a slippery surface. Paper towels or another suitable non-slip surface can provide better footing during the first few days.
Pasty butt can block the vent and needs attention. Gently soften dried droppings with warm water and clean the area without pulling at stuck material. Check the chick’s temperature, hydration, and overall condition as well.
Coccidiosis can cause signs such as bloody droppings, weakness, and reduced activity. Keep the brooder clean and dry, and contact a veterinarian if you suspect an infection. Treatment should be based on veterinary advice.
Pecking can become a problem when chicks are overcrowded, stressed, or exposed to excessive light. Give them enough space and check the brooder regularly for injured chicks.
This information is for general education and is not a substitute for veterinary care. Contact a qualified avian or poultry veterinarian when a chick is sick, injured, or not improving.
David Carter, founder of Farmstead Guide, has over 20 years of hands-on homesteading experience. From raising poultry to practicing sustainable farming, he shares practical tips and insights to help others live a more self-sufficient lifestyle.