Every winter, I see the same mistake repeated. Good chicken keepers hang a heat lamp because they want to help their flock, then spend every cold night worrying about a fire. That fear isn’t exaggerated. Heat lamps have been linked to hundreds of coop fires over the years, including 164 reported incidents in Kansas over a single decade.
Dust, dry bedding, and exposed bulbs are a dangerous combination. I came close to learning that lesson the hard way, and it completely changed how I heat my coop. The good news is that keeping chickens safe through winter doesn’t mean taking that risk. With the right setup, you can protect your flock without turning your coop into a fire hazard.
Our Top Chicken Coop Heaters for Winter
Not every chicken coop heater works the same way. Some warm the air, while others warm the birds directly. After trying different heating methods over several winters at Carter Farmstead, I keep coming back to one option because it gives me the best balance of safety, efficiency, and reliability.
1. Flat-Panel Radiant Heaters (Our Favorite)
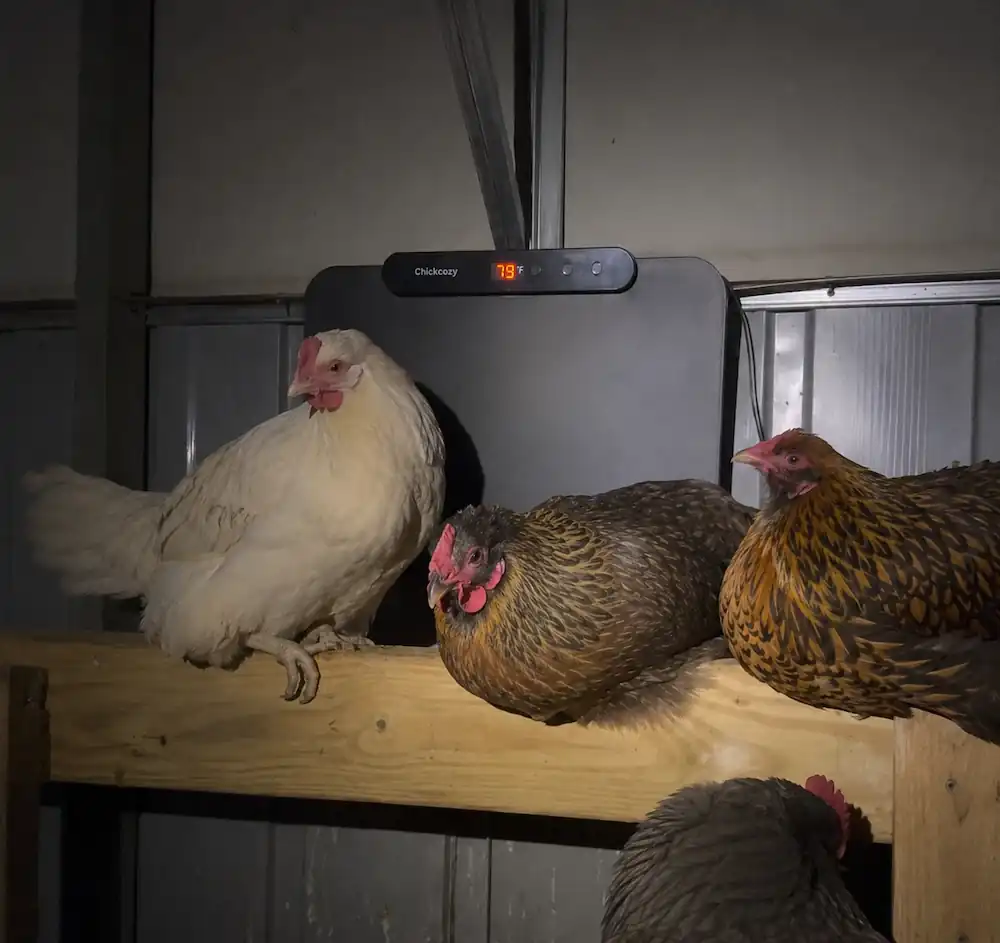
Out of every coop heater we’ve used at Carter Farmstead, the flat-panel radiant heater has consistently been our top choice. It offers the best balance of safety, energy efficiency, and dependable performance.
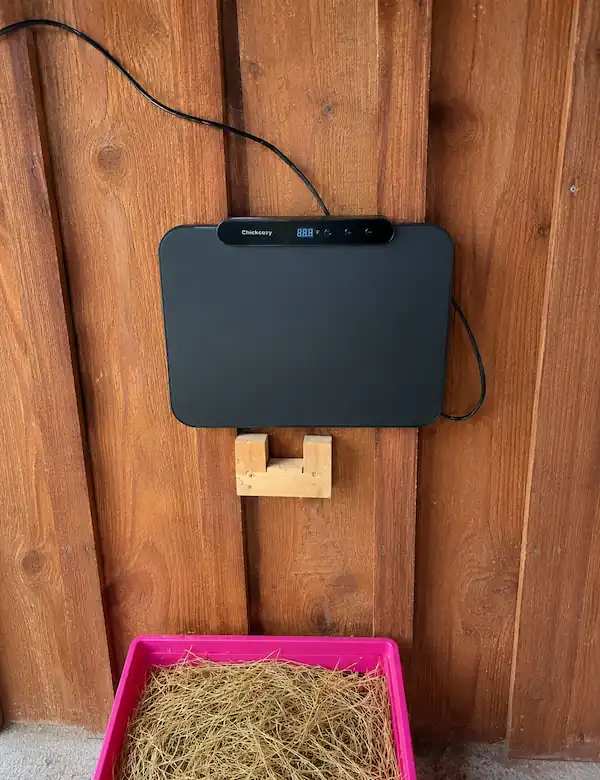
Instead of heating all the air inside the coop, it gently warms the chickens and nearby surfaces. The panel mounts to a wall or can be angled toward the roost, and it stays much cooler than traditional heaters. Most models also use very little electricity and include a built-in thermostat.
We switched to the Cozy Coop Flat-Panel Heater (Shop on Amazon) after retiring our old heat lamps, and I haven’t looked back. It doesn’t try to heat the whole coop, and that’s exactly why it works so well. The gentle radiant heat gives the chickens a warm spot without overheating the space, while the 150W design keeps electricity costs low. It’s simple to mount, runs quietly, and has been one of the safest heating upgrades we’ve made for our flock.
Pros
Safest option with a very low fire risk.
Low-wattage and inexpensive to run.
No exposed heating elements.
Doesn’t overheat the coop.
Cons
Birds need to stay fairly close to feel the warmth.
Won’t heat an entire large coop.
Best for: Small to medium-sized coops where safety is the top priority.
2. Infrared Overhead Heaters
If you need to warm a larger area, an infrared heater can be a good choice. Infrared overhead heaters use a ceramic element to emit long-wave infrared radiation that penetrates feathers and warms the bird’s body directly.
Suspended from the ceiling, they cast a wider heat footprint than a flat panel, making them a better fit for larger coops or extremely cold climates where you need to cover more roosting space. They cover more space than flat panels, but they also run hotter, so proper installation is important.
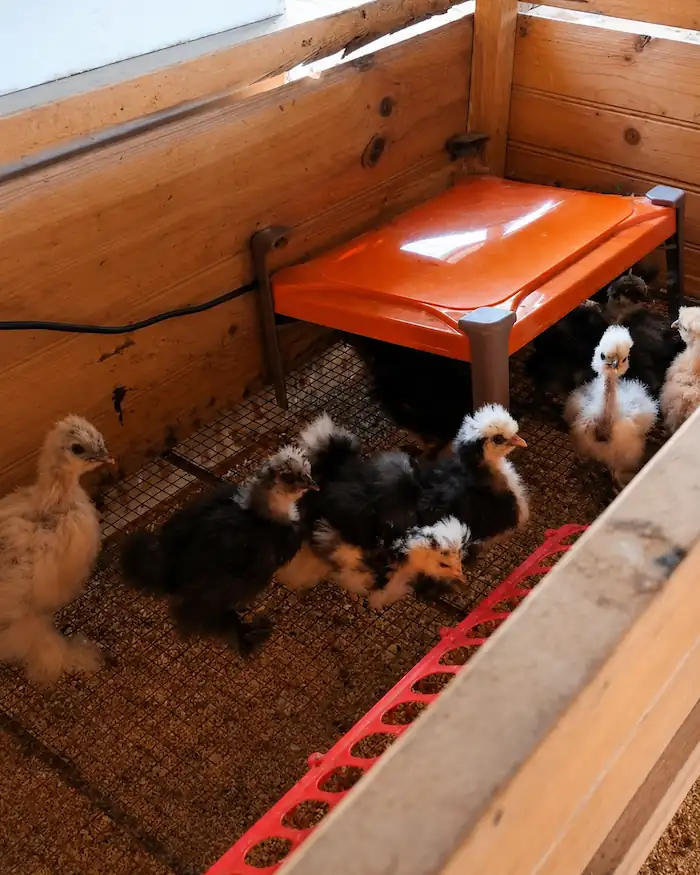
We started using the Sweeter Infrared Heater (Shop on Amazon) in our brooder long before we trusted it inside the coop, and it quickly became our favorite overhead heater for young chicks. What I like most is that it gives off gentle radiant heat without producing bright light, so the chicks stay warm but still settle down and sleep naturally.
Its adjustable hanging chains make it easy to fine-tune the height as they grow, and the built-in safety shutoff adds extra peace of mind. It uses very little electricity, yet has kept our chicks comfortable through every cold spell.
3. Contact Heated Pads
This option works differently because it only warms the spot where a chicken is sitting or standing.
Heated pads are placed under a perch or on a flat surface. Chickens can move onto them whenever they want extra warmth, while the rest of the coop stays at the normal temperature.
Pros
Extremely energy efficient.
Very low fire risk.
Lets chickens choose whether they want the extra warmth.
Cons
Doesn’t warm the surrounding area.
Not enough by itself during severe cold for sensitive breeds.
Power cords need protection from curious beaks.
Best for: Small flocks and well-insulated coops.
Heated Waterers
A heated waterer isn’t a coop heater, but it’s arguably more important than any of the above. Chickens can survive bitter cold if they stay dry and out of the wind. They cannot go without liquid water. A frozen waterer leads to dehydration, a drop in egg production, and real stress on the flock.
Heated waterers come in several forms (belts that wrap around an existing waterer, heated bases, and fully integrated units) and they all do one thing: keep water thawed without warming the coop itself.
Their power consumption is minimal, usually 40 to 60 watts, and the best models activate automatically when the temperature approaches freezing. That means no more ice-breaking chores at dawn and no risk of a bird going thirsty because you slept in. The only real requirement is a nearby GFCI-protected outlet.
We’ve been using the Premier 1 All-Season Heated Poultry Waterer (Shop on Amazon) in our own coop for several winters now, and it has proven to be one of the most dependable winter upgrades we’ve made.
This is the heated waterer we use for our own flock, and it’s one of those products that simply does its job without constant attention. The built-in thermostat only turns the heater on when needed, so it doesn’t waste electricity, while the 3-gallon capacity easily lasts a full day for our chickens.
Even during freezing weather, the water stays ice-free without us having to break ice every morning. I also like the recessed drinking nipples because they help keep the water much cleaner than open bowls. If you want a dependable heated waterer that works through winter with very little maintenance, this is the one I’d recommend for most backyard flocks.
Solar-Powered Chicken Coop Heating Systems
If your coop doesn’t have access to electricity, a solar-powered heating system can provide supplemental heat without running an extension cord from the house. These systems use solar panels to charge a battery or portable power station, which then powers an energy-efficient radiant heater when temperatures drop.
The key is matching the heater’s power requirements to your battery capacity. A small solar panel won’t reliably run a high-wattage heater all night, so low-wattage radiant panels are generally a better fit for off-grid coops.
TIMEBAL 200W Radiant Panel
The TIMEBAL 200W Radiant Panel (Shop on Amazon) is a practical heating component for an off-grid chicken coop. It isn’t solar-powered itself, but you can run it from a solar-charged power station or battery system.
It provides radiant heat without a glowing bulb and includes adjustable temperature control, a remote, memory function, and an anti-tilt shutoff. The 200W output also makes it a more practical match for a solar battery system than higher-wattage heat lamps.
Best for: Off-grid coops using a solar-charged battery system.
Note: You’ll need a suitable battery or portable power station to power this heater from solar energy.
For our own off-grid setup, we’d pair a low-wattage radiant heater like this with a portable power station and solar panel. A setup such as the Jackery Explorer 1000 with a 200W solar panel can store power during the day and provide electricity for the heater when temperatures fall.
Solar heating still works best when the coop itself is dry, well-ventilated, and properly insulated. The goal is supplemental heat, not trying to turn the entire coop into a warm room.
Do Chickens Really Need Heat?
Before spending a dime on heating equipment, let’s look at what the research actually says about whether your flock needs it. The answer, for most keepers, is a firm no. Healthy chickens are much tougher than many people think. A dry, well-ventilated coop matters far more than a warm one.
Understanding Cold Hardiness
A chicken’s body temperature stays around 105°F, and its feathers trap warm air to keep the cold out. Cold-hardy breeds like Rhode Island Reds, Orpingtons, and Wyandottes can handle freezing weather without extra heat as long as they stay dry, out of drafts, and have enough feed.
According to the University of Minnesota Extension, healthy, fully feathered chickens can tolerate temperatures as low as -20°F (-29°C) without supplemental heat if the coop is dry and properly ventilated. Moisture is a much bigger problem than cold.
When Supplemental Heat Makes Sense
There are times when adding heat is the right choice.
You keep cold-sensitive breeds like Silkies or Frizzles.
Your chickens are sick, injured, or elderly.
Temperatures drop suddenly before the flock has time to adjust.
Non-hardy breeds face long periods below 35°F (1.6°C).
The Risks of Heating Too Much
More heat isn’t always better. A warm coop can make chickens less able to handle cold naturally. If the power goes out, the sudden temperature change can be harder on them than steady cold. Extra heat also increases moisture, which can lead to frostbite and respiratory problems if ventilation is poor.
Don’t Forget Ventilation
If I had to choose between a heater and good ventilation, I’d pick ventilation every time. Chickens release moisture every time they breathe, and droppings add even more humidity. Without airflow, that damp air causes more frostbite and breathing problems than cold weather ever will.
Install vents near the roof so warm, moist air can escape without creating drafts where your chickens roost. Following proper coop space requirements alongside good ventilation gives your flock enough room for fresh air to circulate. A good rule is 1 square foot of ventilation for every 10 square feet of coop floor space, and keep those vents open all winter.
Installation and Safety Best Practices
A good heater can only do its job if it’s installed correctly. Most winter coop accidents happen because of poor wiring, bad placement, or skipped maintenance. Here’s what has worked well for us over the years.
Follow Basic Electrical Safety Rules
Before plugging in any heater, make sure the electrical setup is just as safe as the heater itself.
Use only outdoor-rated, grounded extension cords, and keep them as short as possible.
Plug the heater into a GFCI outlet or adapter for extra protection.
Secure every cord with clips or conduit so chickens can’t peck at them.
Never run electrical cords under bedding or through places where they can get pinched.
Check cords and plugs every week. If you notice cracks, fraying, or damage, replace them immediately.
We always spend a few minutes inspecting the heater and wiring before every cold spell. It’s a simple habit that can prevent much bigger problems later.
Install Each Heater the Right Way
Different heaters need different placement to work safely.
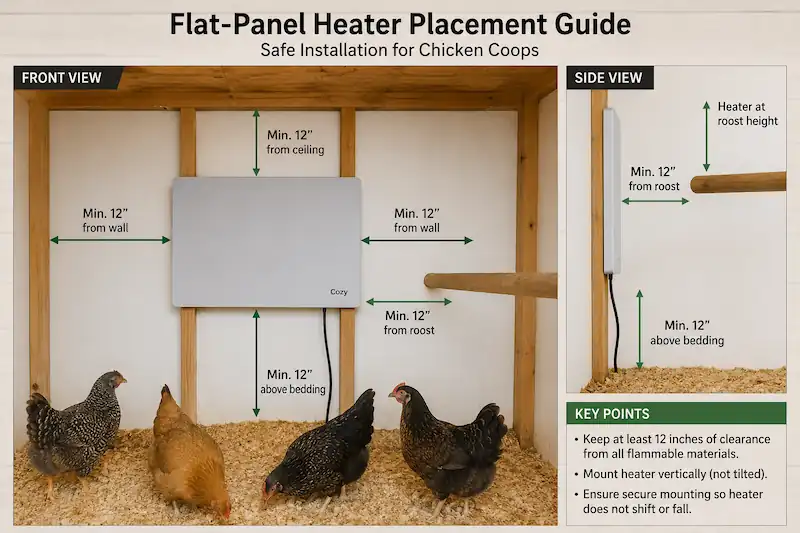
Flat-panel radiant heaters: Mount them at roost height and keep at least 12 inches away from bedding or other flammable materials.
Infrared overhead heaters: Hang them 18-24 inches above the roost using the supplied chains, and always add a backup safety chain.
Heated pads: Place them on a flat surface with only a light layer of bedding over them.
Heated waterers: Keep them on level ground where spilled water won’t soak the bedding, and protect the power cord from curious chickens.
Set the Right Temperature
A chicken coop doesn’t need to feel warm. It only needs to stay safe. We usually keep the thermostat between 35°F and 40°F, which takes the edge off the cold without creating excess moisture inside the coop.
I also keep a separate thermometer at roost height to make sure the heater’s thermostat is reading accurately.
If your heater doesn’t include a thermostat, consider adding a plug-in thermostat controller so the heater only runs when it’s actually needed.
Weekly Winter Safety Checklist
A quick inspection each week can help you catch small problems before they become expensive ones.
Check all power cords for damage.
Remove dust and feathers from the heater.
Tighten any loose mounting hardware.
Compare the thermostat with a separate thermometer.
Make sure roof vents aren’t blocked by snow or ice.
No. Most household space heaters aren't designed for dusty coop environments and can become a fire hazard if bedding, feathers, or dust come into contact with them. If your flock truly needs supplemental heat, choose a low-wattage, UL- or ETL-listed radiant heater made specifically for poultry coops, and always follow the manufacturer's installation and clearance guidelines.
Moisture is the real cause of frostbite, not cold air alone. When humidity builds up inside the coop, it freezes on combs and wattles, leading to frostbite. The best prevention is good ventilation that removes moisture while keeping drafts away from the roost. Some keepers apply petroleum jelly to combs, but a dry, well-ventilated coop has a much greater impact.
No. Chickens handle cold much better than damp, stale air. Sealing the coop traps moisture and ammonia, creating the perfect conditions for frostbite and respiratory problems. A draft-free coop with proper ventilation near the roof is much healthier than one that's completely sealed.
Don't panic. Healthy chickens can usually handle a temporary cold snap as long as they're dry and protected from the wind. Your first priority should be making sure they still have access to unfrozen drinking water. If you rely on electric heat or a heated waterer, keep a backup plan such as a generator, portable power station, or extra water containers ready.
Yes, but only if they're heavy-duty, outdoor-rated extension cords plugged into a GFCI outlet or adapter. Use the shortest cord possible, secure it where chickens can't peck at it, and never run it under bedding or through doorways where it could be damaged. Inspect the cord regularly and replace it immediately if you notice any wear.
Not necessarily. Daylight hours have a much bigger impact on egg production than temperature. Healthy hens with proper nutrition, fresh water, and a dry coop often continue laying through winter without supplemental heat. If maintaining egg production is your goal, adding artificial light is usually more effective than raising the coop temperature.
There's no single temperature that applies to every flock. Consider your chickens' breed, age, health, and how well the coop is insulated. Most cold-hardy breeds don't need extra heat, while Silkies, Frizzles, young birds, or older chickens may benefit from supplemental warmth during extended periods of freezing weather.
A flat-panel radiant heater is the safest option for most backyard flocks. It gently warms the chickens instead of the entire coop, has no exposed heating elements, uses very little electricity, and offers a much lower fire risk than traditional heat lamps when installed correctly.
David Carter, founder of Farmstead Guide, has over 20 years of hands-on homesteading experience. From raising poultry to practicing sustainable farming, he shares practical tips and insights to help others live a more self-sufficient lifestyle.