I still remember raising my first batch of meat chickens. Watching them grow was the easy part. When processing day got close, I started second-guessing everything. Did I have the right equipment? Was the water hot enough? Did I really need all the expensive tools people kept recommending online? The more I searched, the more confusing it became. Every list looked different, and every video made it seem like I needed a trailer full of equipment just to process a few birds.
After processing several batches myself, I’ve learned that most beginners buy things they don’t need and overlook the tools that actually make the job easier. You don’t need a professional setup to get clean, well-processed chickens. You just need the right equipment, a simple workflow, and a little preparation before processing day arrives.
I’ll show you the equipment that’s worth buying, what can wait until later, and what you can safely skip altogether. I’ll also share a few lessons I learned through trial and error so you don’t waste money or spend twice as long processing your first birds.
Choose the Right Breed First
The breed you choose has a bigger impact on your results than almost anything else. Some chickens reach processing weight in as little as 8 weeks, while others take several months but reward you with firmer, more flavorful meat.
If your goal is to fill the freezer as quickly as possible, Cornish Cross is hard to beat. They’re the most popular meat breed for backyard keepers because they grow incredibly fast and produce large breasts and thighs. Under good management, most birds are ready to process at around 8 to 9 weeks.
If you’d rather raise a more active bird, Freedom Rangers are worth considering. They take closer to 10 to 12 weeks to finish, but they forage well, move around more, and many people prefer the slightly richer flavor of the meat. They also tend to have fewer leg problems than fast-growing Cornish Crosses.
If you’re still deciding which breed fits your goals, my article on raising chickens explains the differences between popular backyard breeds and what each one is best suited for.
Give Chicks a Strong Start
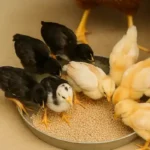
Healthy meat chickens begin with good brooder management. Keep newly hatched chicks in a clean, draft-free brooder with fresh pine shavings. Start the temperature at 95°F during the first week, then lower it by about 5°F each week until the birds are fully feathered.
If you’re wondering what newborn chicks eat, start them on a 20–24% protein chick starter. That extra protein supports the rapid growth meat birds are bred for. Make sure fresh, clean water is available from the moment they arrive. A quick dip of each chick’s beak into the water helps them figure out where to drink.
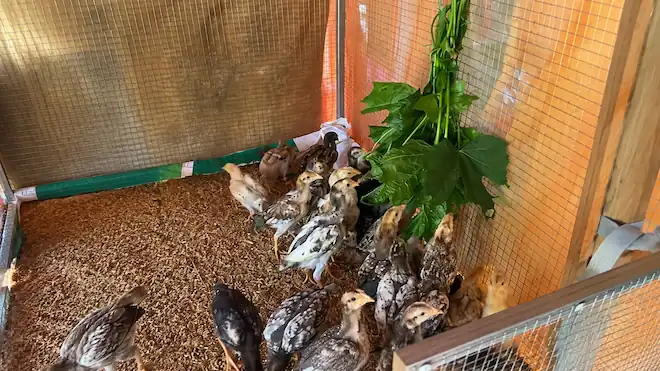
As the chicks grow, many backyard keepers switch to an automatic chicken feeder because it keeps feed cleaner and cuts down on waste. At around three to four weeks, move them to an 18–20% grower/finisher feed.
Move Them Outdoors at the Right Time
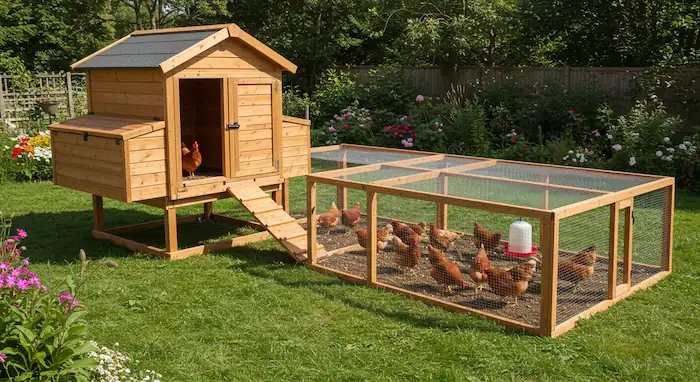
Once the chicks are fully feathered and the weather is warm enough, it’s time to move them outside. A chicken tractor has always worked well in my setup because it protects birds from predators while giving them access to fresh grass, insects, and clean ground. Moving it to fresh pasture each day also prevents manure from building up in one spot.
Aim for about 1.5 to 2 square feet of space per bird. Crowding meat chickens often leads to dirty feathers, wet bedding, and more health problems.
Feed for Healthy Growth
Meat chickens grow much faster than laying hens, so their feeding program is different. As mentioned earlier, start with a 20–24% protein chick starter, then switch to an 18–20% grower or finisher feed once they’re around three to four weeks old.
If you’re unsure what to feed chickens at different ages, I cover it in more detail in my dedicated feeding guide.
If you’re raising Cornish Cross, don’t let them eat nonstop. I usually follow a 12-hours-on, 12-hours-off feeding schedule after the first week. It helps slow growth just enough to reduce leg problems and lowers the risk of heart-related issues without affecting final meat production.
Understanding the Meat Chicken Processing Journey
The first processing day feels different from any other job you’ll do on the homestead. If you’re feeling nervous, that’s completely normal. I certainly was.
I still remember holding my first meat chicken and taking a few extra minutes before I started. Raising a bird is one thing. Processing it for the table is another. Once I reminded myself that I had raised it well, kept it healthy, and was giving it a quick, respectful end, the nerves settled down. After the first bird, I became much more focused on doing the job properly than worrying about it.
Give yourself permission to feel those emotions. They don’t make you any less capable. In many ways, they show that you respect the responsibility that comes with raising your own food.
Don’t rush the day, either.
For a small batch of 5 to 10 birds, I usually set aside most of the day. If you’re hand-plucking, expect to spend around 15 to 20 minutes per bird once you get started. A plucker can cut that time roughly in half, but you’ll still need time for setup, cleanup, and chilling the birds. The first bird almost always takes the longest because you’re learning each step as you go.
Processing is also more physical than many beginners expect. You’ll be standing for long periods, lifting birds and buckets of water, and working around hot equipment. Wear old clothes, waterproof boots, and gloves if you like using them. Keep drinking water nearby, especially if you’re processing during warm weather. Taking a short break between birds is much better than trying to push through when you’re tired.
Essential Meat Chicken Processing Equipment
If I had bought every piece of equipment people recommended, my budget would have disappeared before processing day even arrived. After several batches, it became clear that only a few tools earn their place on the table. Everything else is optional until your flock gets bigger.
If you’re raising 5 to 20 meat chickens, I’d spend money on the essentials first. You can always upgrade later once you’ve figured out what works for your setup.
Before processing your first birds, make sure you have these basic tools.
1. Kill Cone
If there’s one item I wouldn’t process chickens without, it’s a kill cone. It keeps the bird calm, reduces unnecessary movement, and makes the entire process safer for both you and the chicken. Trying to hold a bird by hand is much harder, especially if it’s your first time.
I bought the Large Stainless Steel Chicken Kill Cone with the flat-back design, and it’s worked well for my setup. It mounts securely, cleans up quickly after processing, and is large enough for broilers, ducks, and even smaller turkeys. The included cut-resistant gloves are a nice bonus, although I still prefer using my own gloves. Similar stainless steel cones are popular with backyard keepers because they’re durable, easy to sanitize, and don’t rust easily with regular use.
If you’re on a tight budget, many backyard keepers make one from a heavy-duty traffic cone by cutting off the tip. It works surprisingly well, but make sure it’s mounted securely before you start.
2. A Sharp Knife
A dull knife creates more work than almost anything else. My favorite is the Victorinox Fibrox 6-inch Curved Boning Knife because it holds a sharp edge, feels comfortable even after processing several birds, and the curved, semi-stiff blade gives me good control around joints and during evisceration. It’s easy to see why so many butchers and backyard chicken keepers recommend it. I still keep a pair of kitchen shears nearby for tougher joints or stubborn parts.
One habit that’s saved me plenty of frustration is keeping a honing steel within reach. A few quick passes between birds help maintain the edge without stopping to sharpen the knife.
3. A Large Pot and a Reliable Heat Source
Scalding looks simple until you realize how much water you’re heating. For small batches, I use a large stock pot or turkey fryer pot sitting on a propane burner. It heats faster than a kitchen stove and keeps the temperature much more consistent.
4. Thermometer
Don’t rely on guesswork. Keep the scald water between 145°F and 150°F for most meat chickens. Even a few degrees can make a noticeable difference.
I use a digital probe thermometer because it’s much more accurate than judging the water by sight. The ThermoPro TP19H Instant-Read Thermometer is one of the most widely chosen models on Amazon, and for good reason. It gives fast readings, has a large backlit display that’s easy to read outdoors, and users consistently praise its accuracy and simple operation. If you’re processing older birds with tougher feathers, you may need to scald a few degrees hotter.
| Bird Type | Recommended Water Temperature |
| Young broilers | 145–150°F |
| Older roosters | 150–155°F |
| Mature hens | 150–155°F |
Always check the feathers after a short dip instead of leaving the bird in the water too long.
5. Plucking Surface
There’s nothing wrong with hand-plucking your first few birds. In fact, I’d encourage every beginner to do it at least once. It helps you understand what a properly scalded bird should feel like, and you’ll quickly spot when the water temperature or scalding time isn’t quite right. A simple folding table or homemade plucking board is all you need for your first batch.
That said, hand-plucking gets old fast once you’re processing larger batches. After spending what felt like hours pulling feathers from bird after bird, you’ll understand why so many backyard keepers eventually upgrade to a plucker. If you regularly process more than 10 birds at a time, the Yardbird 21833 Chicken Plucker is one of the best-known options on Amazon.
Its 20-inch stainless steel drum, 110 soft rubber fingers, and 1.5 HP motor remove feathers in seconds instead of minutes, while the built-in irrigation ring continuously washes feathers away to keep the drum cleaner during use. It isn’t cheap, but if you’re raising meat chickens every year, it can save a tremendous amount of time and effort.
6. Evisceration Tools
Keep this station simple and organized. I usually have these items within arm’s reach:
- A sharp boning knife
- Poultry shears
- A bucket for offal
- A garden hose or spray nozzle for rinsing
- Paper towels or clean cloths
Not having to stop and search for tools keeps the process moving and helps everything stay cleaner.
7. Ice Bath Containers
Once a bird is cleaned, it needs to cool down quickly. Large food-grade tubs or insulated coolers work well for holding ice water. I always prepare mine before processing starts. That way, each bird goes straight into the ice bath instead of sitting on the table while I scramble for more ice.
Setting Up Your Backyard Processing Station
A little planning before processing day saves a lot of walking, cleaning, and frustration later. I like having everything ready before the first bird goes into the cone. Once you start, you don’t want to stop every few minutes looking for a tool or moving equipment around.
Choose the Right Spot
Pick a location with plenty of shade, easy access to water, and good drainage. You’ll be rinsing birds, washing tools, and cleaning your work area throughout the day, so a garden hose with a spray nozzle is something I always keep within reach.
Think about privacy, too. Even if home processing is allowed where you live, it’s a good idea to keep the setup out of public view. Before you begin, check your local regulations to make sure you’re following any rules that apply in your area.
Arrange Everything in Order
Set up your workstations in the same order you’ll use them:
Kill Cone → Scald Pot → Plucking Area → Evisceration Table → Ice Bath
Keeping everything in a straight line makes the work much smoother. Instead of carrying birds back and forth across the yard, you’re simply moving from one station to the next.
Don’t overlook comfort, either. Set your tables at a comfortable height, work under a canopy if possible, and stand on an anti-fatigue mat if you’ll be processing several birds. Your back and legs will thank you by the end of the day.
Keep Sanitation Simple
You don’t need a commercial kitchen to process chickens safely, but you do need a clean routine.
I keep a spray bottle with a food-safe bleach solution, clean water for rinsing, paper towels, and a hand-washing station close by. I also sanitize my knife and work surface between birds. It only takes a minute and greatly reduces the chance of cross-contamination.
One habit I never skip is cleaning as I go. My younger brother usually stays on cleanup duty while I focus on processing the birds. It keeps the station organized, and there’s far less mess waiting for us at the end of the day.
Step-by-Step Processing Guide with Equipment Tips
Step 1: Humane Dispatch Using a Kill Cone
Place the chicken into the kill cone headfirst and let it settle for a few seconds. A calm bird is easier to handle and results in a cleaner process. Once it’s secure, use a very sharp knife and make one quick, confident cut. Hesitating only makes the process harder for both you and the bird.
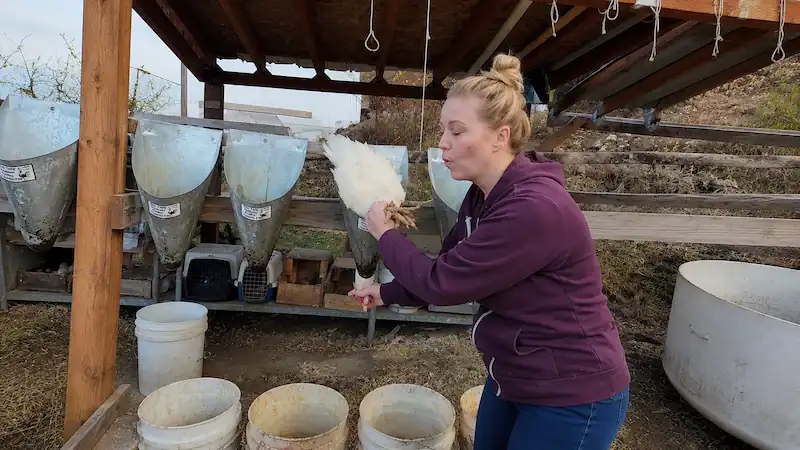
If you’re nervous, practice the motion on a whole chicken from the grocery store first. It won’t replace the real thing, but it helps you become more comfortable handling the knife. Allow the bird to bleed out for 2 to 3 minutes before moving to the next step.
Step 2: Scalding — The Make-or-Break Step
Once the bird has bled out, lower it into water heated to 145–150°F for about 60 to 90 seconds. Keep the bird moving in the water so the heat reaches all the feathers evenly.
The easiest way to check if it’s ready is to pull a wing feather. If it comes out with little effort, you’re ready to pluck. If not, give the bird another 10 to 15 seconds.
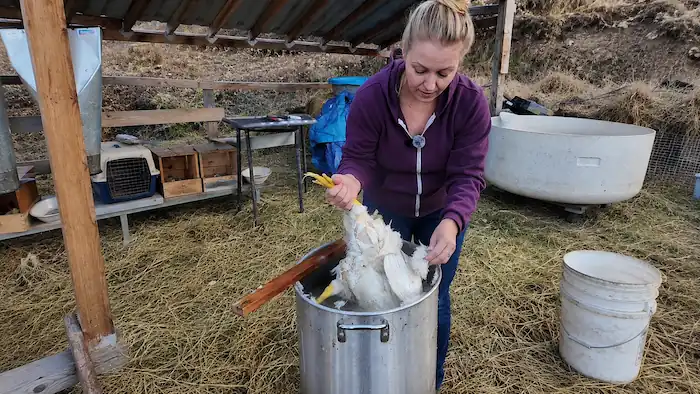
If feathers won’t release easily, the water is probably too cool or the bird needs a little more time. If the skin starts tearing during plucking, the water was likely too hot or the bird stayed in too long.
I keep both my thermometer and a simple timer beside the scald pot. Checking them takes only a few seconds and prevents a lot of extra work later.
Step 3: Plucking
If you’re plucking by hand, begin with the wings and tail since those feathers are usually the toughest to remove. Then work across the body a section at a time instead of pulling feathers randomly. I also like wearing rubber-dipped gloves because they give a better grip on wet feathers and keep my hands more comfortable around hot birds.
Once you’re processing more than 10 birds at a time, a mechanical plucker starts earning its place. Simply place the bird in the drum, turn the machine on, and let it run for 20 to 30 seconds. If you’re using a Yardbird plucker, keep a light spray of water on the bird while it’s spinning. It helps wash away loose feathers and gives cleaner results.
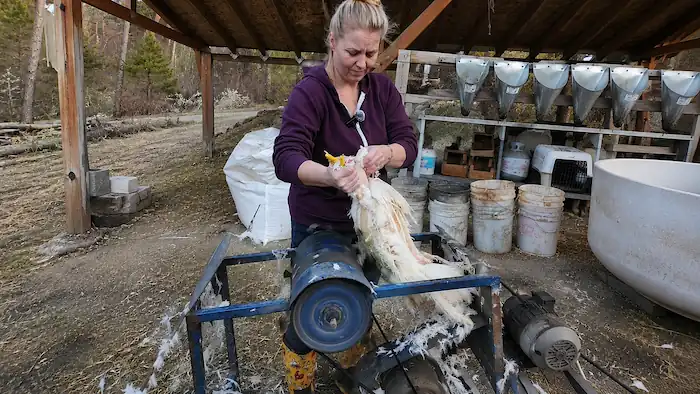
Don’t worry if a few pin feathers remain. Remove them with a small paring knife or a pair of tweezers before moving to the next step.
Step 4: Evisceration
Have everything ready before you begin. I keep a sharp boning knife, poultry shears, a bucket for offal, and a garden hose within easy reach.
Start by cutting around the vent, then carefully open the body cavity just enough to reach inside. With one steady pull, remove the organs while keeping the intestines intact. A clean evisceration feels smooth, with everything coming out together instead of breaking apart.
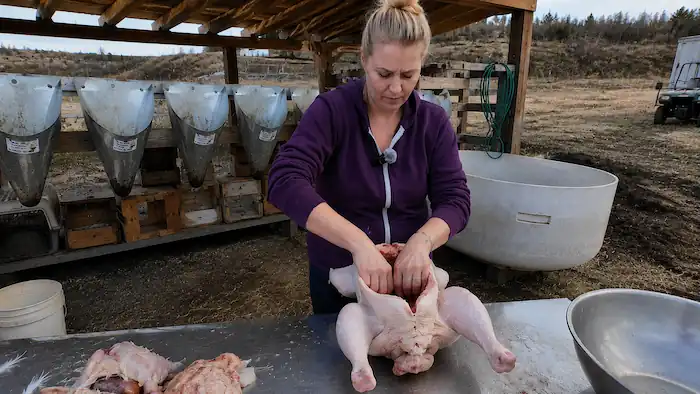
If you accidentally nick the intestines, don’t panic. Rinse the cavity thoroughly with clean water, trim away any contaminated tissue if needed, and sanitize your knife before continuing with the next bird.
Don’t throw away the heart, liver, and gizzard just yet. They’re actually my dad’s favorite part of the chicken, so they never go to waste in our house. If you don’t enjoy eating giblets yourself, there’s a good chance someone else in your family does. Just rinse them well, trim away any unwanted tissue, and chill them with the rest of the meat.
Step 5: Chilling and Resting for Better Meat
As soon as the bird is cleaned, place it into an ice-water bath. The goal is to bring the meat below 40°F within four hours. I always prepare plenty of ice before processing starts because it disappears faster than most beginners expect.
A cooler with a drain plug makes this step much easier since you can drain water and add fresh ice without lifting the entire cooler.
Don’t rush the freezer. I leave processed chickens in the refrigerator for 24 to 48 hours before freezing or cooking. That resting period allows rigor mortis to pass and gives noticeably more tender meat.
| Resting Time | Meat Quality |
| Immediately after processing | Tough and firm |
| 24 hours | Much more tender |
| 48 hours | Best texture for most birds |
Safety, Sanitation, and Common Beginner Mistakes
Processing chickens doesn’t have to be complicated, but staying safe should always come first. A few simple habits will protect both you and the quality of your meat.
Wear Basic Protective Gear
You don’t need fancy equipment, but don’t skip the basics. I always wear heavy-duty rubber gloves, a waterproof apron, and non-slip boots. They protect against hot water, sharp knives, and slippery ground. If you’re buying gloves, choose a pair that extends up to your elbows to keep your arms clean and dry.
Keep Everything Clean
Clean as you work instead of waiting until the end. I keep a spray bottle with a food-safe bleach solution (1 tablespoon of unscented bleach per gallon of water) for sanitizing tables and tools between birds.
I also compost feathers and most offal away from the processing area. It keeps odors down and gives the material a useful purpose. One thing I avoid is leaving waste where neighbors or wildlife can get into it. It only takes one bad experience to realize how important proper disposal is.
Five Common Beginner Mistakes
- Using water that’s too hot: The skin can tear while plucking. Always check the temperature with a thermometer instead of guessing.
- Working with a dull knife: A sharp knife is safer and gives cleaner cuts. I give mine a few passes on a honing steel every few birds.
- Waiting too long to chill the meat: Get each bird into an ice bath as soon as it’s cleaned. I often freeze a few water jugs beforehand so the ice lasts longer.
- Trying to process too many birds: Your first processing day isn’t a race. I recommend starting with five birds or fewer until you’re comfortable with the workflow.
- Freezing the chicken too soon: Give the meat 24 to 48 hours in the refrigerator before freezing or cooking. That extra time makes a noticeable difference in tenderness.