Thinking about raising quail for fresh eggs or meat, but worried about the high cost of ready-made cages? Many beginners face the same challenge when searching for affordable and reliable housing options.
Building your own quail cage is a smart solution. It saves money, lets you customize the setup to suit your birds, and ensures proper space, safety and easy cleaning. This guide will show you how to build a simple, secure and practical cage with confidence.
A general quail coop works well for backyard flocks, combining predator protection, proper ventilation, and easy access for cleaning, feeding, and egg collection. Coops can be stationary or slightly elevated depending on your space.
Understanding Quail Needs: What Your Birds Really Require
Before you start building, it’s important to understand what quail actually need to stay healthy and productive. Good housing isn’t just about putting up wire and wood. It’s about creating a safe and comfortable space in accordance with proper poultry care guidelines.
We’ve carefully researched trusted guidelines from university extension services and poultry science departments, including resources from institutions such as Penn State Extension, to understand proper space, ventilation and humane care standards.
On top of that, we’re also sharing insights from our own extensive hands-on experience with raising quail, so the advice here is both research-backed and practical in real-life settings.
1. Give Them Enough Space
Quail may be small, but they still need room to move around.
A good rule of thumb is at least 1 square foot per standard Coturnix quail.
Larger breeds or breeding pairs will need a bit more space.
If you overcrowd them, they can become stressed, start pecking each other, and get sick more easily. Aim for at least 1 square foot per standard Coturnix quail, more if possible to prevent stress, pecking, and health problems.
2. Proper Ventilation
Fresh air is very important. Poor airflow can lead to respiratory problems and ammonia buildup, resulting in bad odors. Design your cage so air can move through it easily (cross-ventilation works great).
At the same time, protect your birds from strong, direct drafts, especially in cold weather. Make sure there’s good airflow, but always block strong drafts, particularly during winter.
3. Strong Predator Protection
Quail are small and vulnerable, so predators are a real threat. Common predators include raccoons, foxes, hawks, and even snakes.
To keep your birds safe:
Use galvanized hardware cloth, not chicken wire.
Choose small openings (½” x ½” or smaller).
If the cage sits on the ground, bury the wire around the edges to stop digging predators.
Install strong, secure latches on every door and access panel.
Never rely on chicken wire; it’s too weak. Use sturdy hardware cloth and predator-proof latches to prevent break-ins and escapes.
4. Easy Cleaning & Waste Management
A clean cage keeps your birds healthy and reduces smell.
Add removable waste trays to catch droppings.
Consider a slightly sloped floor so waste falls into a collection area.
Clean regularly to prevent ammonia buildup.
Design your cage so cleaning is quick and simple. Removable trays or sloped floors make a huge difference.
5. Comfort & Enrichment
Happy quail are productive quail. Provide a dust bath area with sand or diatomaceous earth. This keeps feathers healthy and helps control parasites. Protect them from harsh sun, strong wind, and heavy rain with a solid roof and at least one solid wall. Give them small hiding spots or covered areas so they feel secure.
Even in raised cages, include a secure dust bath area. Also, make sure your cage has a solid roof and some wind protection for comfort and safety.
Types of Quail Cages Explained & Compared
Not all quail cages are the same. The best design depends on how many birds you have, how much space you’re working with, and whether you’re raising them for eggs, breeding, or just as pets. Let’s break down the most popular DIY options in simple terms.
Different breeds of quail can vary in size, temperament, and how much space they need, so keep those differences in mind when comparing cage styles.
You can also design your cages in a modular or scalable way, meaning you can add more levels later, expand the setup, or even include nesting boxes if needed.
1. Stacked Hatcher/Breeder Cages
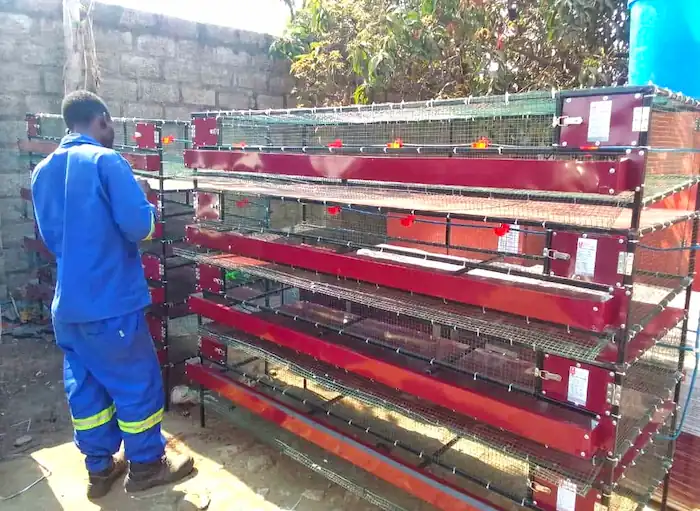
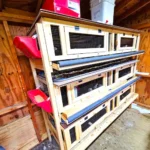
Stackable Quail Cage are built in layers, one on top of the other. They’re great if you want to save space.
Pros
Saves a lot of space (uses vertical height)
Good for larger flocks
Works well in controlled setups like sheds or garages
Easier to manage egg collection and waste if designed properly
Cons
Not very natural for the birds
Needs a proper waste and egg collection system
Slightly harder to build
When raising chicks, a hatching time quail cage is essential. These cages provide extra warmth, protection, and proper flooring for young quail to thrive during their first few weeks.
2. Tractor Cages (Mobile Pens)
These are movable cages placed on the ground. You shift them regularly so birds get fresh grass and insects.
Pros
Birds can forage naturally
Fresh ground reduces waste buildup
Great enrichment for the birds
Manure spreads naturally on soil
Cons
Takes up more ground space
Must be moved often for safety
Can be risky if predator protection isn’t strong
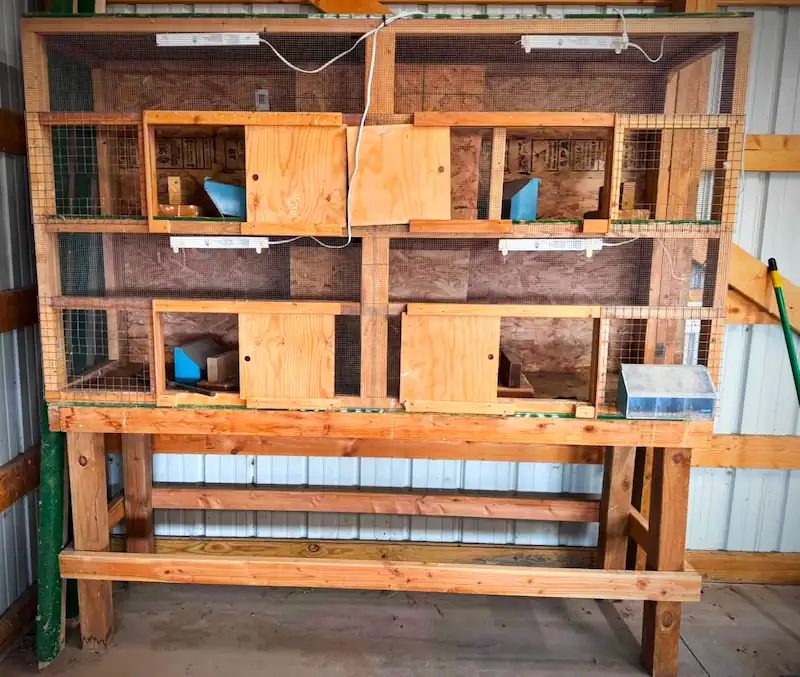
3. Hutch-Style Cages (Stationary & Elevated)
These are raised cages that stay in one place. Very common for backyard setups.
Pros
Strong predator protection
Easy to clean
Good airflow
Easy access for feeding and egg collection
Cons
Takes permanent space
No natural foraging
4. Button Quail Specific Enclosures
Button quail are much smaller than standard Coturnix, so they need special setups.
About 1 sq ft per bird, small floor footprint (vertical setup)
$75 – $250+ per stack
Tractor Cage
Small flocks, pasture raising
Larger ground space, movable
$100 – $300+
Hutch Style
Backyard flocks
Medium footprint, raised design
$80 – $200+
Button Quail Specific
Small pet quail
Small footprint
$40 – $150
Costs are general estimates and can vary depending on your location, material prices, and design choices. Always check current material costs in your area before starting your build.
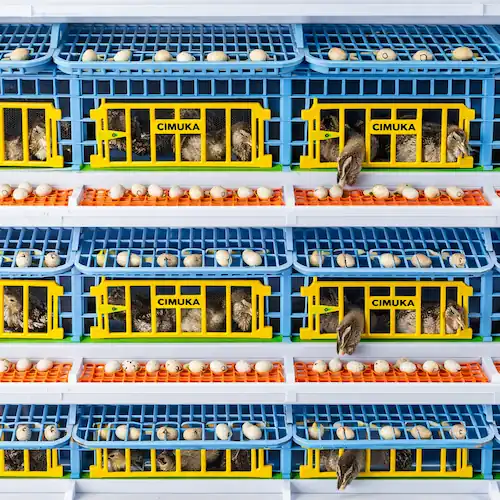
5. Cimuka Quail Cage
The Cimuka quail cage is a starter kit option for beginners. It comes with a simple brooder section, feeder, waterer, and secure enclosure, making it ideal for first-time quail keepers.
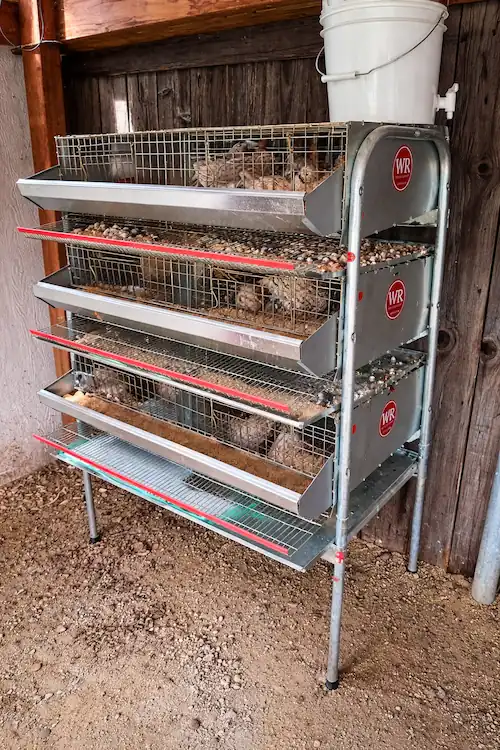
6. Wynola Ranch Quail Cage
For larger flocks or commercial setups, the Wynola Ranch quail cage offers durable construction and high-capacity layouts. These cages are designed for efficiency in feeding, egg collection, and maintenance.
Choosing the right cage really depends on your goals. If you want efficiency and higher production, stacked cages work well. If you prefer a natural setup, tractor cages are great. For most backyard keepers, a simple hutch-style cage is more than enough.
Key Design Considerations (Pre-Build Checklist)
Before you start building your quail cage, take a little time to plan things properly. Many beginners feel unsure about which materials to choose, how much they’ll spend, or whether their design will actually work long term. Considering these essential points first can save you money, time and frustration.
Budget Assessment
Start with a clear idea of your budget. Material costs can vary by location, so it’s wise to check current prices before buying. New materials often look cleaner and last longer, but reclaimed or repurposed materials can significantly reduce costs. For example:
Wood is sturdy and easy to work with, but PVC can be lighter, more moisture-resistant, and sometimes cheaper.
Old shelves, metal racks, or scrap lumber can often be reused to build strong cage frames at a lower cost.
Available Space & Location
Next, decide about where the cage will be placed. For apartment or indoor backyard setups, an indoor quail cage keeps your birds safe from harsh weather and predators. These cages are usually elevated, ventilated, and designed to minimize mess while giving your quail a comfortable home.
An outdoor cage, on the other hand, needs to handle direct sunlight, wind, rain, and predators.
Pay attention to how much sun the area gets during the day, the direction of strong winds, and whether the ground drains well after rain. Standing water around the cage can create hygiene issues. It’s also important to check local rules and housing restrictions on poultry before you build.
Climate Adaptation
Your cage should match your weather conditions.
In hot climates, focus on strong ventilation and shade.
In cold climates, add insulation and block drafts.
In humid areas, make sure airflow prevents moisture buildup.
Protect against heavy rain, snow, strong sun and high winds.
A climate-ready cage keeps your quail comfortable all year.
Number of Birds & Purpose
Your design should match your goal. Birds raised for eggs need easy egg collection and a comfortable space. Breeders may require divided sections. Meat birds need sufficient space but usually simpler setups.
It’s also smart to think about the future. If you plan to expand your flock later, consider building a modular system that allows you to add sections or stack levels easily.
Ease of Cleaning & Maintenance Access
Cleaning will be part of your routine, so design for convenience. Make sure you can easily reach inside the cage for feeding, watering and egg collection. Removable waste trays or sloped flooring can make cleaning faster and reduce ammonia buildup. The simpler your maintenance routine, the healthier your birds will be.
Predator Protection & Security
Security should never be overlooked. Choose strong wire mesh with small openings, and make sure the wire is thick enough to resist chewing or pulling. Install solid, secure latches on all doors and access panels and build the frame firmly so predators cannot pry it open. A strong structure gives you peace of mind.
Egg Collection System
If you’re raising laying quail, a roll-out egg system can make life much easier. By slightly sloping the cage floor, around 5 to 7 degrees, eggs gently roll into a collection tray outside the cage. This prevents pecking and makes daily collection quick and simple.
Taking the time to plan these details before building will help you create a cage that is safe, practical, and built to last.
Along with choosing the right cage, following proper quail-raising practices ensures your flock stays safe, comfortable, and productive.
How to Build a Quail Cage: DIY Plans, Materials & Step-by-Step Instructions
A DIY quail cage makes sense when you need to fit a specific space, want to build several cages, or simply prefer to control the materials and layout yourself. The important part isn’t making the cage look fancy. The floor, egg roll-out, waste tray, ventilation, and access points need to work properly.
This design uses a 36-inch-wide by 24-inch-deep EMT frame, 1/2-inch welded wire, a slightly sloped floor, an aluminum egg-collection lip, and a removable ABS manure tray. The bird compartment is kept relatively low to reduce the distance a startled quail can launch upward.
You can adjust the overall dimensions to suit your space and flock. Just keep the floor properly supported, the mesh openings appropriate for the birds, and the cage easy to clean and access.
Materials List with Budget-Friendly Options
Here’s what you’ll need for this particular build. Prices vary by supplier, and you may already have some of the smaller hardware on hand.
Material
Quantity
19-gauge hot-dipped galvanized welded wire, 1/2″ × 1/2″, 24″ or wider (Shop on Amazon)
#8-32 × 1/2-inch stainless-steel machine screws with washers and lock nuts (Shop on Amazon)
As needed
One material choice I’d prioritize: use 24-inch-wide welded wire for this 24-inch-deep cage. It lets you make the floor from one continuous piece instead of joining two narrower pieces and creating a seam where a foot could potentially catch.
Safety Gear
Work gloves, preferably cut-resistant
Safety glasses
Dust mask for cutting and drilling
These tools cover everything you need to build a sturdy, safe, and practical quail cage efficiently.
Step 1: Build the EMT Frame
Start by building the bottom rectangle from the 1/2-inch galvanized EMT conduit. For this design, the finished footprint is approximately 36 inches wide by 24 inches deep.
Add the vertical supports and then connect the top frame. Keep the bird compartment relatively low, around 8–10 inches of usable height, rather than building it like a chicken enclosure.
Before attaching any wire, check that the frame is square and that the bottom supports are level. The EMT connectors and fittings provide the structural connections. The nylon zip ties in the materials list are only for attaching the welded wire, not for holding the frame together.
Take a little extra time here. A crooked frame can make the floor slope uneven and make the door and egg roll-out harder to fit later.
Step 2: Install the Welded-Wire Floor
The floor is one of the most important parts of the entire cage. Use the 19-gauge, 1/2-inch × 1/2-inch hot-dipped galvanized welded wire for the floor. With the recommended 24-inch-wide material, you can cover the 24-inch floor depth with one continuous piece.
Cut the wire slightly larger than the floor area, position it over the frame, and secure it tightly to the EMT using the heavy-duty nylon zip ties. The wire should be well supported underneath. Don’t leave a large unsupported span where the floor can sag under the birds’ weight.
Keep the cut edges facing outward whenever possible. Trim or bend any remaining cut ends away from the birds. Before moving on, inspect the entire floor from both sides. You want a firm, reasonably smooth surface with no protruding wire ends.
Step 3: Set the Egg Roll-Out Slope
The floor needs a slight downward slope toward the front so eggs naturally move into the collection area. For a 24-inch floor depth, raising the back by approximately 2 inches creates a slope of about 4.8°. That’s close to the lower end of a 5–7° target, so use it as a starting point rather than treating the measurement as an absolute requirement.
The easiest approach is to build the floor supports at slightly different heights. Don’t rely on bending the welded wire to create the slope. Once the floor is positioned, check the slope across the entire 36-inch width. Then test it with a spare quail egg.
The egg should roll gently toward the front. If it barely moves, increase the slope slightly. If it accelerates too quickly and hits the collection edge hard, reduce it.
Step 4: Attach the Side and Back Walls
Cover the sides, back, and remaining front sections with the same 1/2-inch welded wire. Cut the panels to fit the individual sections of the EMT frame rather than trying to wrap the entire cage in one piece.
Secure the mesh with the UV-resistant nylon zip ties. Space the ties closely enough that the wire stays firmly against the frame without large sections bowing outward.
You want the finished walls to be secure but still provide plenty of airflow. Again, pay attention to the cut edges. Keep them facing outward whenever possible, and trim, bend, or cover anything that could come into contact with a bird.
Step 5: Build the Egg Roll-Out
The front of the sloped floor needs a small lip to prevent eggs from simply rolling off the cage. Use the aluminum flashing for this part. Cut a strip long enough to span the front edge and position it so that it catches eggs as they reach the end of the sloped floor. The flashing doesn’t need to support significant weight. Its job is to provide a smooth transition into the collection area.
Check the entire length for sharp corners or exposed edges. Fold or smooth anything that could damage an egg or injure a bird. Before moving on, roll several eggs across the finished floor. They should reach the collection area without hitting the lip hard enough to crack.
Step 6: Install the ABS Manure Tray
The 24 × 36-inch ABS sheet becomes the removable manure tray beneath the wire floor. Position it underneath the cage so droppings fall directly onto the plastic rather than onto the ground.
Because the ABS sheet is only 1/16 inch thick, don’t leave it unsupported across a large span. Use the lower EMT frame or additional supports to keep the tray from sagging as manure accumulates.
The tray should slide out from the front without requiring you to move the cage or disturb the birds. For routine cleaning, pull it out, scrape or wash away the waste, and slide it back into place. A removable tray is one of the biggest practical advantages of this design. You can clean the waste area without dismantling the cage.
Step 7: Build and Install the Door
Make the door large enough for you to comfortably reach inside for routine maintenance, catching a bird, or adjusting equipment. You don’t need to make the entire 36-inch front a door. Leave enough EMT around the opening to keep the front of the cage rigid.
Cover the door with the same 1/2-inch welded wire and secure the mesh with the nylon zip ties. Attach the door using the two 2.5-inch butt hinges and install the small metal latch on the opposite side.
If the door frame is made from EMT, don’t assume ordinary wood screws will provide a suitable connection. Use a fastening method appropriate for the conduit and hinge design. Your machine screws, washers, and lock nuts can be useful where you can pass the hardware completely through a suitable mounting point.
Once the door is installed, check it several times before moving on. You should make sure it swings freely without rubbing against the frame. The latch should hold the door securely enough that a quail cannot push or squeeze it open.
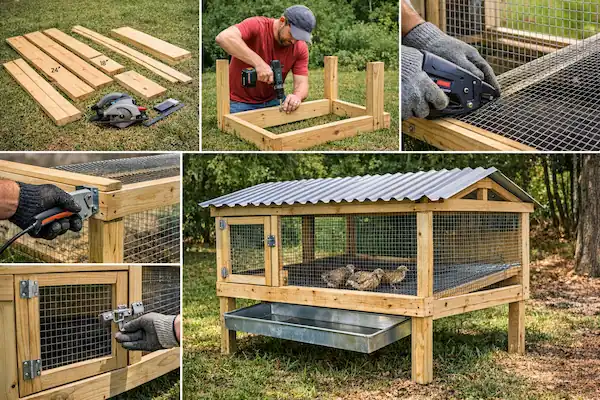
From pre-cut lumber to finished hutch: a step-by-step look at building a safe, elevated quail cage with wire mesh, predator-proof doors, and an easy-to-clean waste system
Step 8: Remove Every Sharp Edge
This is the inspection you should never skip. Carefully check the entire inside of the cage, especially around:
Door openings
Floor edges
Wire seams
EMT connections
Cut wire ends
Zip-tie tails
Aluminum egg lip
Corners
Areas where wire overlaps
The underside of the floor
Trim every exposed zip-tie tail flush. If you joined any pieces of wire, pay particular attention to the seam. Two pieces of welded wire can create an uneven surface or another potential location for a sharp edge.
Run your fingers carefully over the accessible surfaces. If you find a sharp point, fix it before putting the quail inside. A small exposed wire end can cause an injured foot, toe, or wing, so this final inspection is worth taking seriously.
Before You Put the Quail Inside
Give the finished cage one final check. Make sure:
The floor is rigid and doesn’t sag noticeably.
The slope moves eggs toward the front.
Eggs reach the collection area without cracking.
The manure tray slides out easily.
The door opens wide enough for routine access.
The latch cannot be pushed open by a bird.
No wire or metal edges are exposed inside.
The mesh is securely attached to the EMT frame.
Feeders and waterers don’t create sharp edges or obstruct the birds.
The cage has adequate ventilation and protection from direct weather if it will be outdoors.
At this point, the cage should be ready for its equipment and birds.
DIY vs. Buying a Ready-Made Quail Cage
Building your own cage gives you control over the dimensions, materials, access points, and waste-management system. It’s particularly useful when you need a cage that fits an unusual space or want to build several units with the same design.
If you don’t want to cut and assemble the frame yourself, a ready-made quail cage can save considerable time. Look for the same features you’d want in a DIY build: a properly supported floor, suitable mesh, secure doors, an egg-collection system, and a removable manure tray.
That makes the decision less about whether DIY or commercial cages are inherently better and more about whether your time, tools, space, and flock size make building one worthwhile.
If you prefer a ready-made option, see our guide to the best quail cages to compare ready-to-use models for different flock sizes and setups.
One option worth considering is this galvanized stackable quail cage (Check Price on Amazon). It has a removable tray and stacked design that can make feeding, egg collection, and cleaning easier.
Common DIY Quail Cage Mistakes
Don’t make these four shortcuts.
Using chicken wire for the floor: Chicken wire is too flexible for a quail cage floor, and its openings can create foot and leg problems. Use 1/2-inch welded wire with adequate support underneath instead.
Skipping the floor slope: A flat floor leaves eggs where the birds walk and defecate. Give the floor a slight, consistent slope toward the front so eggs roll into the collection area without rolling too aggressively.
Making the cage too tall: Coturnix quail can launch upward when startled. A low ceiling reduces the distance available for a hard vertical impact. Keep the usable height around 8–10 inches for this style of cage, while making sure feeders and waterers don’t create launch points.
Leaving materials exposed to moisture: Wood can work for some cage frames, but areas repeatedly exposed to urine and wet manure are difficult to keep sanitary. With an EMT frame, you avoid this problem in the main structure. Keep the manure area centered over the removable ABS tray and use moisture-resistant materials wherever waste or moisture can accumulate.
Maintaining Your Quail Cage: Cleaning, Care & Longevity
A clean and well-maintained cage is vital for healthy, happy quail and a long-lasting setup. Daily care involves emptying waste trays, refilling waterers and feeders and collecting eggs from roll-out systems. Providing a balanced diet to your quail keeps him healthy and energetic alongside a well-designed cage.
Scrubbing wire floors and cage surfaces weekly or monthly, checking for pests, and inspecting wood, wire and latches for damage will help prevent bigger problems.
Proper waste management like composting droppings and disposing of soiled bedding, not only keeps the cage hygienic but can also benefit your garden. Outdoor cages benefit from good drainage and applying bird-safe sealants or paints to wooden components can extend their life.
David Carter, founder of Farmstead Guide, has over 20 years of hands-on homesteading experience. From raising poultry to practicing sustainable farming, he shares practical tips and insights to help others live a more self-sufficient lifestyle.