Moving a beehive takes more than lifting the box and carrying it to a new spot. You need to keep the colony secure, prevent overheating, protect the comb, and help returning foragers find their hive after the move.
The right method depends on how far you need to move the hive. Shifting it a few feet within your yard is different from transporting it several miles to another property.
If you are removing a wild colony from a wall or tree, you will need a different approach altogether.
For an established hive, move it during a cool evening or early morning when most foragers are inside. Secure all hive components, provide adequate ventilation during transport, and have the new location ready before you begin.
Quick Guide to Moving a Beehive
Moving a few feet: Shift the hive gradually over several days, allowing the bees to reorient themselves.
Moving across your yard: Plan for returning foragers. Gradual movement or a temporary relocation farther away may be more reliable than moving the hive in one go.
Moving several miles away: Secure the hive, provide sufficient ventilation, transport it carefully, and open it at the new location once it is safely positioned.
Moving a wild colony: Swarms, established colonies in walls, and colonies inside trees require different removal methods. Contact an experienced beekeeper or bee-removal professional when needed.
Why Would You Need to Move a Beehive?
There are several reasons to relocate a honey bee colony. You might need to move a hive because the surrounding area no longer provides enough forage, the colony is exposed to flooding or other hazards, or you need to reorganize your apiary.
Sometimes, a hive needs to be moved away from a busy walkway, a property boundary, or an area where people frequently work.
You may also need to transport colonies to another location for better forage or seasonal honey production.
Wild colonies present a different challenge. Bees may establish a nest inside a wall, shed, hollow tree, or other structure.
If the colony creates a safety concern, a professional may be able to remove and relocate it without destroying the colony.
Whatever your reason, plan the move before disturbing the hive. A little preparation helps reduce stress on the colony and prevents avoidable problems during transport.
Best Time to Move a Beehive
The best time to move a hive is generally during a cool evening or early morning, when most foraging bees have returned. Cooler conditions can also reduce the risk of overheating while the colony is confined.
The season matters, too, but there is no single best season for every climate.
Spring: Moving may be convenient while you are managing colonies and preparing for the active season. Choose suitable weather and avoid unnecessary disturbance during cold conditions.
Summer: Move during cooler hours and pay particular attention to ventilation. Hot weather can make transporting a confined colony dangerous.
Autumn: Move when necessary, allowing the colony enough time to settle before colder weather or a period of limited forage.
Winter: Avoid unnecessary moves during cold weather, particularly when bees are tightly clustered. If relocation is essential, get advice from an experienced local beekeeper.
Avoid moving a hive during extreme heat, severe storms, or conditions that make lifting and transport unsafe.
Choose a time when the bees are less active, but do not assume that moving after dark removes the risk of stings. Wear protective clothing throughout the process.
If the bees on your property are causing a nuisance, you can get rid of them without killing them.
Equipment Needed to Move a Beehive
Gather everything before you start. Once the entrance is closed, you should be ready to lift and transport the hive without unnecessary delays.
If you’re new to beekeeping, a beekeeping starter kit can help you get essential tools, such as a bee suit, smoker, and hive tool.
Bee suit and veil: Protect your face and body from stings.
Gloves and sturdy footwear: Help protect your hands and feet while handling the hive.
Smoker and hive tool: Useful for normal hive handling when appropriate.
Ratchet straps: Hold the hive boxes, bottom board, and lid securely together.
Ventilated entrance screen: Restricts bee movement during transport while allowing airflow.
Dolly or hive cart: Helps move heavy colonies without excessive lifting or tilting.
Suitable vehicle or trailer: Provides enough space to carry the hive securely.
A helper: Makes lifting and loading safer, especially with heavy or stacked colonies.
For long-distance transport, use suitable screened ventilation and secure all hive components. Never rely on a closed entrance alone to protect a confined colony from overheating.
How to Move a Beehive Step by Step
These instructions apply to an established colony in a movable hive box, rather than a wild colony living inside a building or tree.
1. Prepare the New Location
Choose the destination before moving the hive. Set up a stable, level hive stand and make sure the location has suitable forage, access to water, and enough space for normal bee activity.
Consider the direction of the entrance, nearby vegetation, access for future inspections, and the safety of people and animals passing through the area.
If you are moving the hive to another property, check access and any local requirements for transporting honey bee colonies.
2. Check the Hive Before Moving It
Inspect the exterior for loose boxes, damaged wood, gaps, and a lid that could shift during lifting.
Make sure the frames are properly seated and that the hive components are in good condition. Heavy honey supers increase the weight, so remove unnecessary weight if appropriate and safe to do so.
Do not casually remove brood frames or rearrange the nest simply to make the hive easier to carry.
3. Secure the Hive Components
Use strong ratchet straps to hold the boxes and bottom board together. Secure the lid as well, and check that the straps cannot slip during transport.
A hive can become unstable when lifted or when a vehicle turns or brakes suddenly. Never assume the boxes will remain together simply because the bees have sealed them with propolis.
For a heavy colony, use a suitable lifting aid and get help rather than attempting to carry it alone.
4. Close the Entrance Safely
After most foragers have returned, restrict the entrance using a secure, purpose-made ventilated screen or another suitable screened closure.
Check for additional openings that could allow bees to escape during transport. At the same time, make sure the colony has sufficient airflow.
Never seal a hive airtight. Bees generate heat, and a confined colony can overheat quickly, particularly in warm weather or inside a stationary vehicle.
5. Lift and Transport the Hive Carefully
Keep the hive as level as possible while lifting and loading. Avoid sudden jolts, tilting, hard braking, and sharp turns.
For vehicle transport, secure the hive to the vehicle so it cannot slide or tip over. Keep it out of direct sunlight and maintain good airflow around the colony.
Plan your route and fuel stops in advance. Do not leave a confined colony sitting in a hot vehicle while you run errands.
6. Set the Hive Down at Its New Location
Place the hive on the prepared stand and check that it is stable. Once the hive is secure, remove the transport closure promptly when conditions are suitable.
Do not leave the bees confined longer than necessary. If the weather is hot or the colony appears overheated, prioritize safe ventilation and seek experienced help if needed.
Some bees may circle around the entrance as they learn the new location. These orientation flights are normal.
How to Move a Beehive a Short Distance
Moving a hive a few feet or across your yard can be more complicated than a long-distance move. The reason is that older worker bees learn the position of their hive using nearby landmarks.
If you move the hive directly to a new spot within the same area, some foragers may return to where the entrance used to be. They may gather at the old location instead of finding the relocated colony.
The traditional “3 feet or 3 miles” rule is a useful starting point, not an absolute rule. The exact outcome depends on the distance, surroundings, and how the move is carried out.
Method 1: Move the Hive Gradually
If the move is not urgent, shift the hive a small distance at a time over several days.
Move the hive after most foragers have returned.
Shift it a short distance toward the new position.
Keep the hive level and secure after each move.
Allow the bees time to reorient before shifting it again.
Repeat until the hive reaches its destination.
Moving only a few feet at a time is a commonly recommended approach. The exact distance and interval may need to be adjusted to suit your apiary.
Method 2: Relocate the Hive in One Move
Sometimes, moving the hive gradually is not practical. You may need to clear a work area or move the colony away from a hazard.
In that case, you can move the hive directly to the new location, but expect that some foragers may return to the old spot.
A temporary, suitably equipped catch hive or nuc box at the old location may collect some of these bees. Check it regularly and transfer the bees appropriately once they have gathered.
This method is not guaranteed to recover every returning forager, so it should not be treated as a substitute for planning the move.
Method 3: Move the Hive Away Before Returning It
Another option is to move the colony to a location outside its familiar foraging area, leave it there long enough for the colony’s foraging population to change and reorient, and then move it to the intended final location.
This requires a suitable temporary apiary and additional handling. The appropriate distance and holding period depend on local conditions, so consult an experienced beekeeper before choosing this approach.
How to Move a Beehive Long Distances
Moving a hive several miles away or transporting colonies to another property requires careful preparation.
The main priorities are keeping the colony secure, maintaining ventilation, and minimizing the time it spends confined.
Before the Move
Prepare the destination and make sure the hive stand is ready.
Check the vehicle, tires, fuel, and route before loading.
Choose cooler conditions whenever possible.
Wait until most foragers have returned.
Secure the lid, boxes, and bottom board with strong straps.
Fit a suitable screened closure and verify that the hive has adequate ventilation.
Arrange help and suitable lifting equipment for heavy colonies.
If the hive contains heavy honey supers, consider whether removing some weight is appropriate. Avoid unnecessary disturbance to the brood nest.
During Transport
Keep the hive upright and firmly secured. Avoid sudden braking and rough handling.
Make sure air can circulate around the hive. A screened entrance alone may not provide enough ventilation for every hive design, especially during a long journey or in hot weather.
Never leave a confined colony in a parked vehicle exposed to high temperatures. If you must stop, make sure the bees remain safely ventilated and protected.
Do not routinely spray sugar water into the hive through the transport screen. It is not a substitute for ventilation, and excess moisture or sticky residue can create additional problems.
After Arrival
Place the hive in its final position as soon as practical. Check that the stand is stable and the boxes have not shifted.
Open the entrance when the hive is secure and conditions are suitable. Do not keep bees confined longer than necessary simply to make them settle.
Observe the entrance for normal flight activity. Some circling and orientation flights are expected as the bees learn their new surroundings.
Give the colony time to settle before opening it for a full inspection. If the hive has been jolted, overheated, or otherwise damaged, assess it promptly and get help if needed.
Check that bees are foraging normally and the queen is laying eggs. Some confusion or circling flights are normal at first.
How to Move a Wild Beehive into a Hive Box
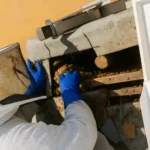
Moving an established colony out of a wall, tree, or building is different from transporting a standard hive. You may need to expose comb, transfer brood, and locate the queen while protecting the colony.
Wild colony removal can also involve hidden cavities, electrical wiring, structural damage, aggressive bees, and other hazards. If you are inexperienced, contact a qualified bee-removal professional rather than opening the structure yourself.
1. Swarm Capture
A swarm is a cluster of bees that has left its original colony. A fresh swarm may settle on a branch or another exposed surface while scout bees search for a permanent home.
An experienced beekeeper can often collect an accessible swarm by gently shaking or brushing the bees into a suitable container and transferring them to a hive.
Bees usually swarm when a colony reproduces by splitting, often because of overcrowding or changing colony conditions.
Not every swarm will stay, and the method is different from removing an established colony with built comb and brood.
2. Trap-Out Method
A trap-out may be used when a colony lives inside a cavity that cannot easily be opened. A specially designed one-way exit allows bees to leave the cavity but prevents them from returning through that exit.
A suitable receiving hive is placed nearby. However, trap-outs can take considerable time, and the original queen and developing brood may remain inside the structure.
A trap-out does not guarantee that the entire colony will relocate, and it may not eliminate the need to remove the remaining comb or repair the cavity. Get advice from an experienced professional before attempting one.
3. Cut-Out Method
A cut-out involves opening the structure and transferring the colony and comb into suitable hive equipment. This method can be disruptive and requires experience with brood comb, the queen, and colony management.
A typical cut-out may involve:
Exposing the nest while minimizing unnecessary damage.
Identifying brood comb and locating the queen where possible.
Carefully removing suitable comb sections.
Securing appropriate comb in frames using suitable supports.
Transferring the bees into a properly prepared hive.
Managing the remaining bees and ensuring the receiving colony is secure.
Brood comb needs particular care because it contains developing bees. Honey-filled comb can also be heavy and may break during handling.
Do not assume that moving the visible bees and some comb means the entire colony has been removed. Remaining bees, brood, and comb may need further attention.
4. Colonies Inside Hollow Trees
If a colony lives inside a hollow tree, moving the entire section of trunk may sometimes be possible. However, cutting or lifting a tree section can be dangerous and may require professional tree work or heavy equipment.
Do not cut a tree or move a heavy trunk section without suitable expertise and equipment. A qualified tree professional and experienced beekeeper can assess whether the colony can be relocated safely.
5. Storm-Damaged or Exposed Colonies
If a storm exposes a nest, keep people and animals away from the area. Avoid disturbing the comb or trying to handle the colony without suitable protective equipment and experience.
An experienced beekeeper may be able to transfer suitable comb and bees into hive equipment. If the structure is unstable or the colony is difficult to access, professional help is the safer choice.
Once the hive reaches its new location, monitor it without causing unnecessary disturbance.
Provide Water and Suitable Forage
Make sure bees have access to a reliable, safe water source and that the new location offers suitable forage.
If natural food is scarce or the colony needs extra support after the move, choosing the best bee feed can help provide the nutrients and energy they need.
Use a suitable bee feeder rather than spraying syrup into a confined hive during transport. Avoid spills that could attract robbing bees.
Watch for Overheating or Damage
Look for abnormal clustering outside the hive, excessive fanning, damaged boxes, or signs that the colony has been exposed to excessive heat.
Some fanning and orientation flights are normal, but a heavily clustered colony after transport in hot weather may need closer attention. Check ventilation and the hive’s condition before assuming the bees are simply settling down.
Reduce the Entrance if Necessary
If the colony is weak or the new location creates a risk of robbing, an entrance reducer may help the bees defend the hive. Make sure the opening remains appropriate for the colony’s needs and does not restrict ventilation.
Allow Time Before a Full Inspection
Watch the hive entrance for normal activity. Give the colony time to settle before opening it for a routine inspection, unless there is a clear reason to check for damage or another urgent problem.
At the next suitable inspection, check for normal brood development, signs of queen activity, adequate food stores, and any damage caused during transport.
Learning about the life cycle of bees can also help you understand brood development and the changes you may see after relocation.
Final Thoughts
Moving a beehive safely comes down to preparation, careful handling, adequate ventilation, and choosing the right method for the distance involved.
For a nearby move, think about how returning foragers will find the entrance. For a long-distance journey, focus on securing the hive and preventing overheating.
If the bees are living inside a wall or tree, assess the situation carefully before attempting removal.
Plan the move before disturbing the colony, and give the bees time to reorient once they reach their new home.
Yes, but you cannot guarantee that every bee will remain with the colony. Moving after most foragers have returned, securing the hive properly, and choosing an appropriate relocation method can reduce losses. For short moves, gradual relocation is often a practical option.
For a short move within your yard, moving the hive gradually may help foragers reorient. For a longer relocation, moving beyond the colony's familiar foraging area can reduce the chance that bees return to the old site. The traditional three-mile guideline is not a guarantee, and local conditions matter.
It is generally easier to move a hive during a cool evening or early morning when most foragers are inside. If a daytime move is unavoidable, plan carefully and use suitable equipment, adequate ventilation, and experienced help.
Not automatically. If suitable forage and water are available, extra feeding may not be necessary. If food is scarce or the colony has limited stores, appropriate feeding may help. Use a suitable feeder and avoid spilling syrup around the apiary.
If the hive arrived safely and the bees are behaving normally, give the colony time to settle before a routine inspection. If the hive was damaged, overheated, or badly jolted, assess the situation sooner. The condition of the colony matters more than following a fixed waiting period.
It is safer to postpone the move until cooler conditions if possible. If relocation is urgent, adequate ventilation, a short journey, careful handling, and protection from direct sunlight are essential. Never leave a confined colony in a hot, stationary vehicle.
No. A movable hive can usually be secured and transported as a unit. A wild colony inside a wall, tree, or building may require a swarm collection, trap-out, or cut-out. These methods require different equipment and experience, and professional help may be necessary.
David Carter, founder of Farmstead Guide, has over 20 years of hands-on homesteading experience. From raising poultry to practicing sustainable farming, he shares practical tips and insights to help others live a more self-sufficient lifestyle.